Using the Public API through the Power BI Desktop Connector
This article reviews how to integrate Secureworks® Taegis™ VDR’s results directly in Power BI as a data source in order to run your own data analytics on vulnerabilities and assets.
If you need to extract VDR’s data through its Public API through the VDR Power BI Connector, this article will guide you through the steps necessary to configure Power BI Desktop to access VDR’s data through OAUTH2 authentication mechanism.
Create a Public API Client in VDR ⫘
Follow the instructions found at Creating Public API Clients.
Tip
For Power BI, use https://oauth.powerbi.com/views/oauthredirect.html as a redirect URI.
Authorize Power BI Desktop to use Third-Party Connectors ⫘
-
After opening Power BI Desktop, go into File → Options and Settings → Options.
-
In the menu that appears, select Security from the left side, and in the Data Extensions section, choose Allow any extension to load without validation or warning.
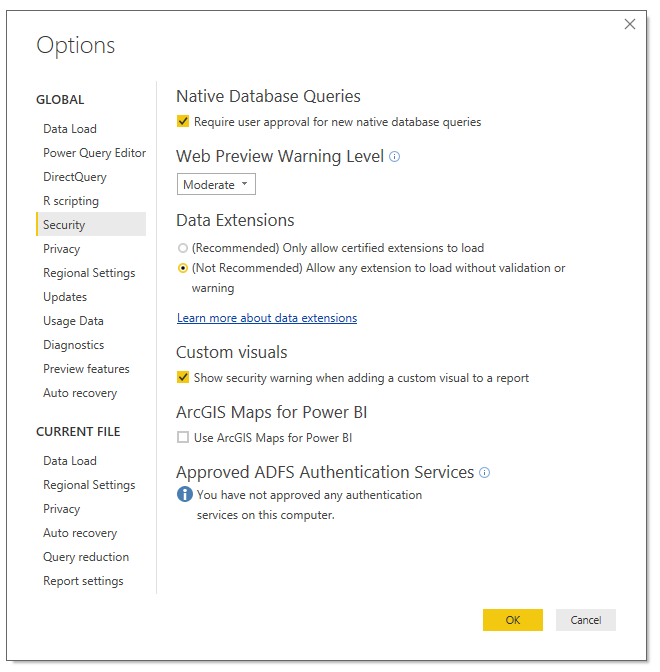
Options > Security
- Close Power BI Desktop to save the changes.
Install VDR's OpenAPI Connector ⫘
Directly Use a Provided .mez File ⫘
If you were provided with a .mez file, place the file in the right Power BI Desktop folder: C:\Users\<YOURUSER>\Documents\Power BI Desktop\Custom Connectors\
Power BI Desktop will load .mez files automatically at boot and provide you with the connector listed in your Data Sources. If it does not appear in the Data Sources, check that you have successfully authorized third-party connectors and that the file is in the right folder.
Important
The .mez file contains sensitive information such as your Client ID, your Client Secret, and your instance URL. Handle this file with care.
Compile Your Own .mez File ⫘
Follow the instructions on our GitHub page where VDR’s Data Connector is hosted.
Connect to VDR's OpenAPI through OAUTH2 ⫘
-
After opening Power BI Desktop, open the connector by using the Get Data function of Power BI Desktop.
-
The Get Data menu displays all the available connectors. Search for “VDR“ in the upper left corner in order to find VDR’s Public API connector: you should see OpenAPI - VDR (Beta) appear in the search results.
Note
If no results display, the connector is either not in the right folder, or the security options are still blocking it from loading.
-
Use the Connect button to start the OAUTH2 connection mechanism. A new menu to sign in to VDR displays.
-
Select Sign in.
-
You will then be presented with the regular OAUTH2 login screen of VDR, in which you should use your pre-defined applicative’s Username/Password to authorize this Client ID to get a Token for a predetermined period of time (choose the one you think is best).
Note
The authorization level must be equal to or lower than your Client ID’s scopes as defined in VDR when you created it.
Note
PowerBI will cache the access in the Data Source parameters. It is possible that you may need to clear them manually if you want to re-initialize the authentication.
-
Once the connectivity is established, a window displays that indicates that you are currently signed in.
-
After the authorization has been set up, select Connect to browse the different requests in the Navigator.
Using the OpenAPI GET Queries to Fetch the Vulnerability Groups Data ⫘
- Once in the Navigator, Power BI Desktop will show you all the available GET requests in VDR’s public API, as functions that you can call with different parameters.
Note
At the moment, Power BI Desktop does not allow you to do any requests other than GET requests (no POST or PATCH).
- Using the checkboxes, you can select a specific request and send parameters to get the data back.
For instance, if you want to get a list of “vulnerability groups“ (a similar list as the product's frontend Vulnerabilities page) for a specific search query, you can do so by selecting the _api_v2_vulnerability-groups_get function in the left section, and set the parameters for the request using the following guidance:
- Change the Limit parameter to the number of vulnerability groups you want to get for each request.
- Change the Offset parameter if you want to look for the next page/group of vulnerability groups (this can be useful to chain multiple small queries instead of doing a big query).
- Change the Sort parameter if you want the vulnerability groups to arrive pre-sorted upon certain criteria.
- Use the q (query) parameter to specify that you want the vulnerability groups matching a certain search criteria; e.g.,
{**global**: {**text**: **XSS**}}. The query language is documented at Using the Search Grammar with the API.
- Once you have decided on your request parameters, select Apply to get a preview of the data being fetched in VDR’s public API.
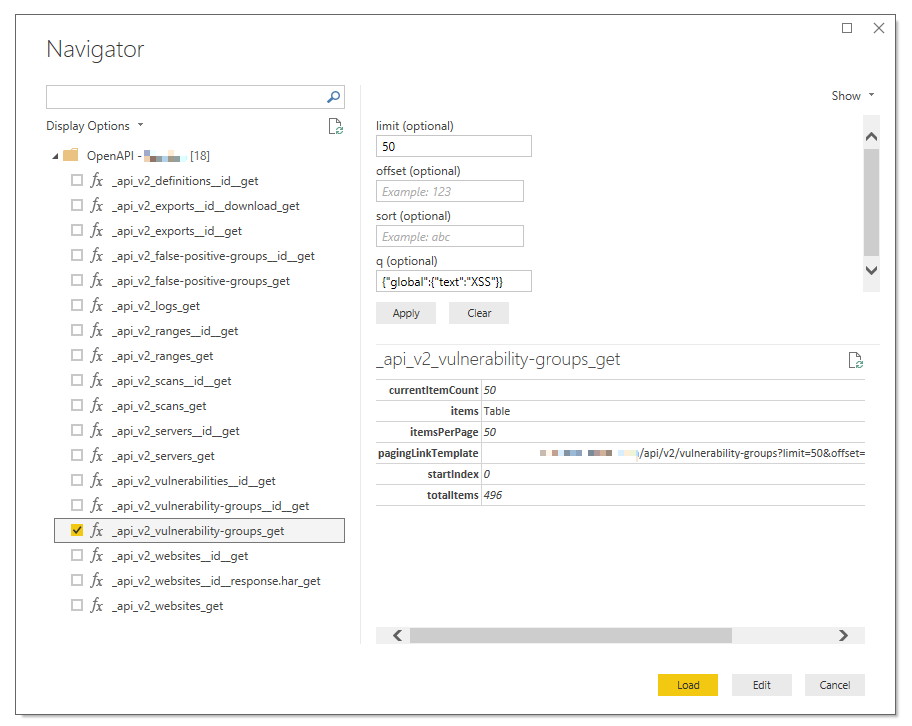
Apply Parameters
Note
It is possible that endpoints displayed in the list above differ in naming from what you see in the preceding screenshot. Refer to VDR’s OpenAPI Swagger API documentation for details about each endpoint.
- Select Load to load the data into Power BI Desktop. You will then be transferred to the data view, or you can select the Data icon in the top left corner of Power BI Desktop.
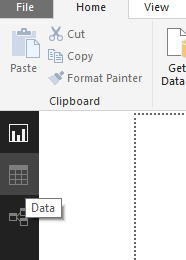
Data Icon
- From the data view, Power BI Desktop displays the results as a table, with a “sub-table“ in the items section. In order to expand this table and access the vulnerability groups themselves, use the Edit Queries function.
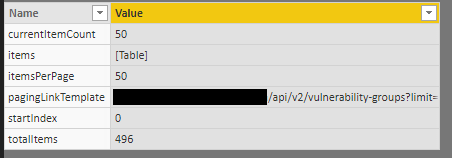
Items Table

Edit Queries Icon
- The Power Query Editor window then displays, allowing you to select the Table in the items line and get an expanded view for all the vulnerability group items. Use the Close and Apply button to save this modified data source.

Query Editor
- Apply your changes to work on that new transformed data source, and use the graphing feature to extract the information you are looking for.
Publishing Your Dashboard ⫘
After deploying the connector and building the required metrics/dashboards using PowerBI Desktop, the actual views can be pushed to Office 365 PowerBI. Use the Publish to PowerBI option from the PowerBI Desktop client (sign-in and workspace selection required based on your organization):
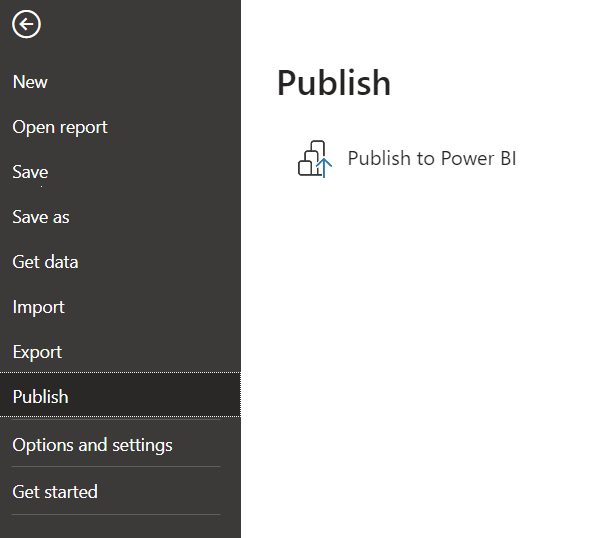
Publish to PowerBI
A Report and Dataset will be created in PowerBI online associated to your selected Workspace.
Scheduling Auto-Refresh ⫘
Before being able to schedule auto-refresh, follow this Microsoft guide to install and use an on-premises data gateway.
After installation, use this Microsoft guide to deploy and use custom data connectors with the gateway. This applies also to the Secureworks VDR PowerBI connector.
The next steps describe the actions needed in the online PowerBI interface to set the scheduled refresh using the previously deployed gateway and associated connector.
Important
Using the on-premises data gateway deployed locally requires the system hosting it to be online and the service running at the time of the scheduled refresh.
- In the navigation pane under Datasets, select More options (...) next to your dataset.
- Select Schedule refresh.
- In the Gateway Connection section, add a new Data Source using the following parameters:
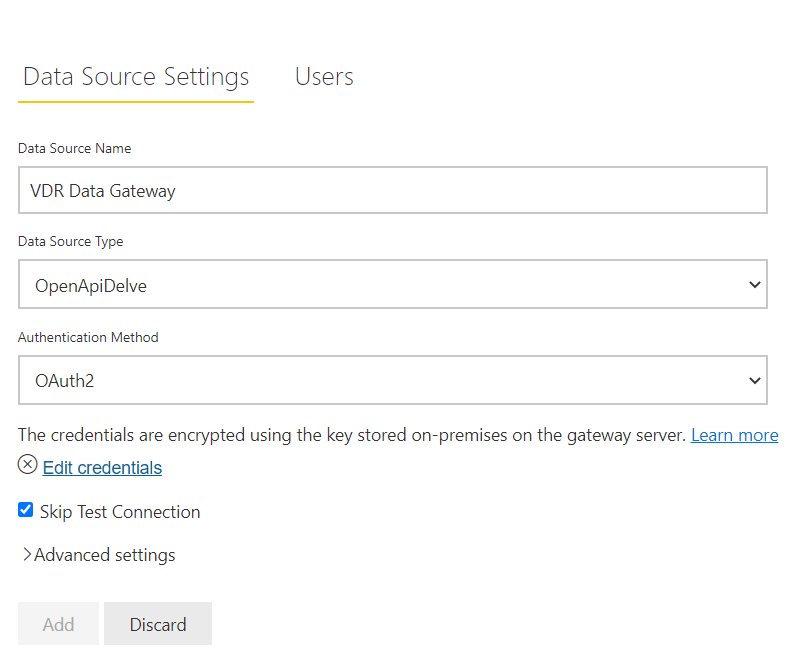
Data Source Settings
Before being able to get to the next step, select Edit credentials and sign in to VDR to authorize the connector.
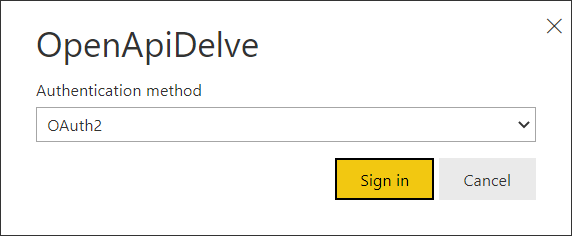
Sign in to VDR
Sign in with your credentials to VDR and authorize the connection.
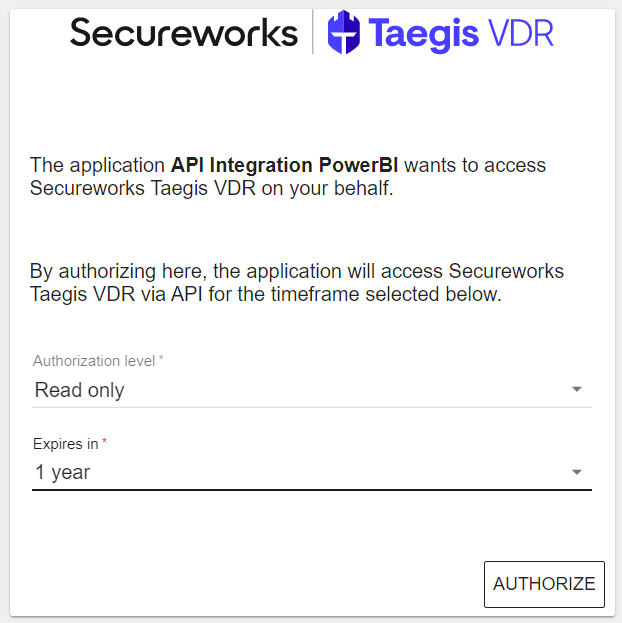
Authorize PowerBI
- In the Gateway Connection section, select your gateway and map it to your previously defined data source.
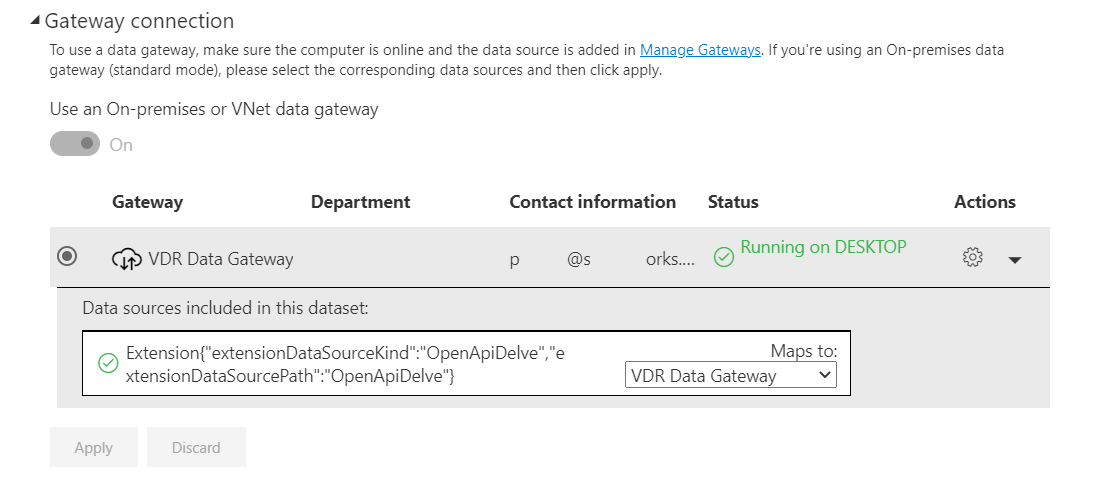
Gateway Connection
- Finally, in the Scheduled Refresh section, choose your desired time and frequency.
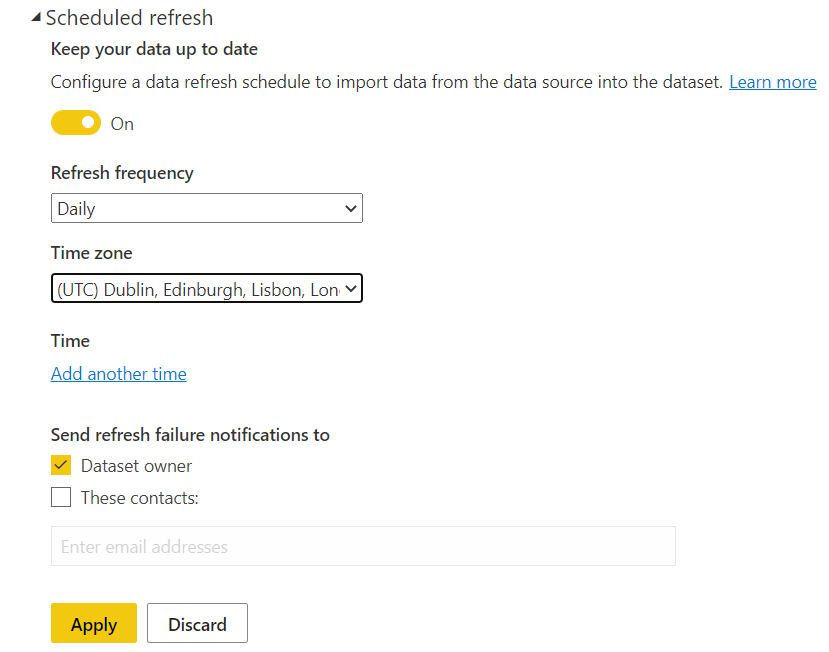
Scheduled Refresh
