Adding Assets via Auto Discovery
This article describes how to add new assets in Secureworks® Taegis™ VDR through Auto Discovery.
Add Assets Using Auto Discovery ⫘
From the top menu, select Auto Discovery and then select the + icon in the top right corner to add a new range:

Add New Range
In the Add New Range modal that appears, configure a new range using the following parameters:
- Team — By default this is the team context you are in. It can be selected using the Team selector in the top menu.
- IP Range — Use this field to configure your range using standard CIDR notation.
- Edge Service — Specify whether your assets are to be reached through an installed Edge Service or through the Internet (see Reaching Firewalled & Internal Assets).
- Tags — Select the tags that will be associated with all the newly discovered assets.
- Auto Discovery Schedule — Use this field to let VDR autonomously schedule auto discoveries without further action.
- Discovered assets scan frequency — Use this field to autonomously schedule scans on newly discovered assets without further action.
Select the Show more options link to specify these additional parameters:
- Exclusions — If you need to exclude certain addresses from being discovered, provide a list of IPs or ranges (one per line).
- Contact Information — Provide the contact information that will be associated with all the newly discovered assets.
- Description — Provide description information that will be associated with all the newly discovered assets.
Once you have entered the information in the modal, select Add and Discover Now to start the Auto Discovery immediately or select Add to start it at a later time.
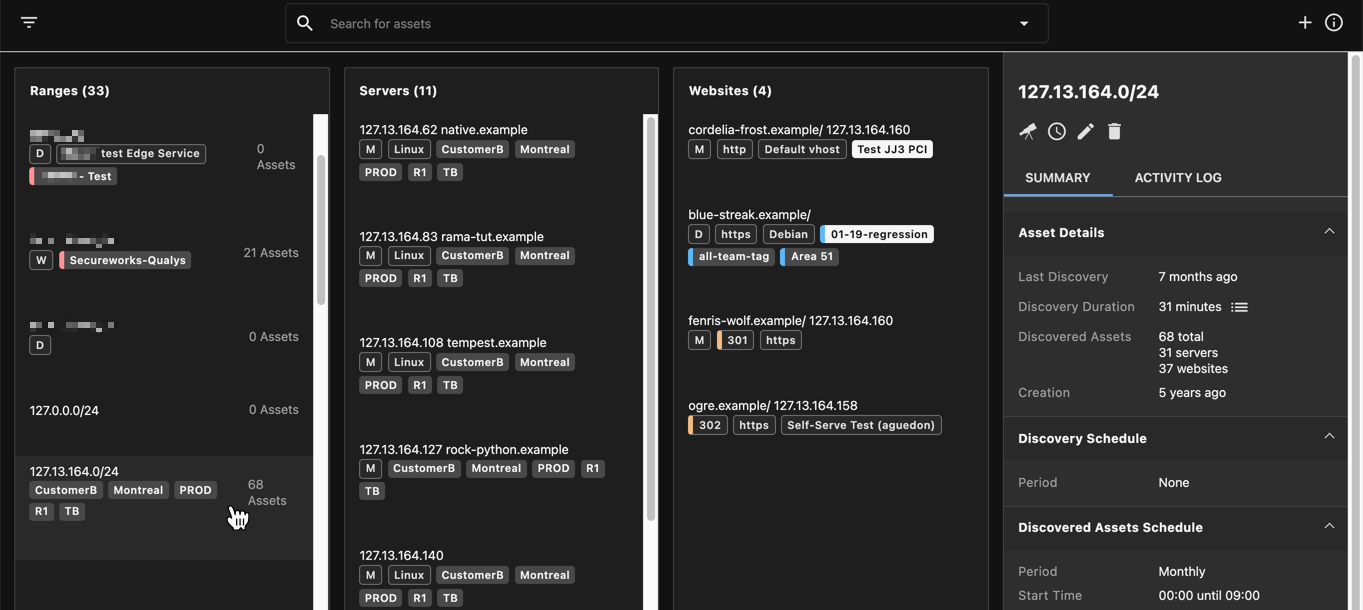
When Auto Discovery is running, you will see newly discovered assets being displayed on the Auto Discovery screen:

Auto Discovery
Exclude Assets ⫘
To exclude specific IPs or ranges, add them to Exclusions in the Auto Discovery schedule, one per line. When Auto Discovery launches, it will not scan the excluded IPs and they will not be added to the list of assets.
If a range has already been scanned with Auto Discovery and the assets have been added to Servers/Websites, the following can be done:
- Add IPs/ranges that need to be excluded to Exclusions in the Auto Discovery schedule.
- Perform one of the following:
- Set the schedule of the added assets to None so that they are not scheduled for future scanning.
- Delete the assets from Servers/Websites. They will not be re-added since they are listed in the Exclusions in the Auto Discovery schedule.
- Navigate to Schedules and confirm the assets are not listed in future scans.
Schedule Auto Discovery ⫘
Note
To ensure a continuous network security of all your connected devices and web apps, it is best to schedule your Auto Discovery to run on a regular interval and automatically feed newly discovered assets to the scan schedule.
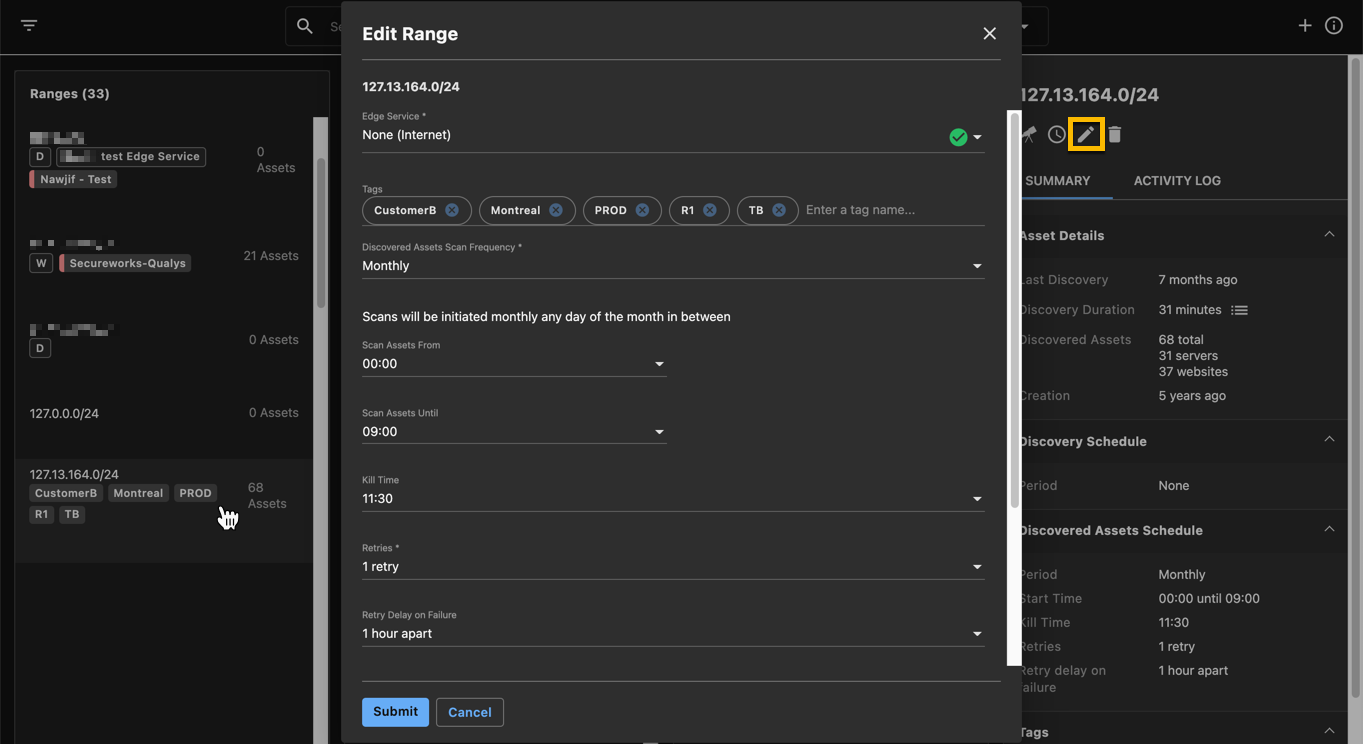
Edit a range by selecting one from the Ranges column. Access the edit and schedule buttons from the right side navigation.

Edit Range
Once your Auto Discovery schedule is set, an icon appears in the range entry indicating the Auto Discovery period:

Schedule Auto Discovery
Tip
When updating your Auto Discovery schedule, such as the date, time, or tags, the updates will only apply to newly discovered assets. You will need to manually apply these changes to previously discovered assets if you would like their settings to be modified.
Manual Discovery ⫘
- Navigate to the Auto Discovery page.
- Select a Range to display the range details on the right side of the page.
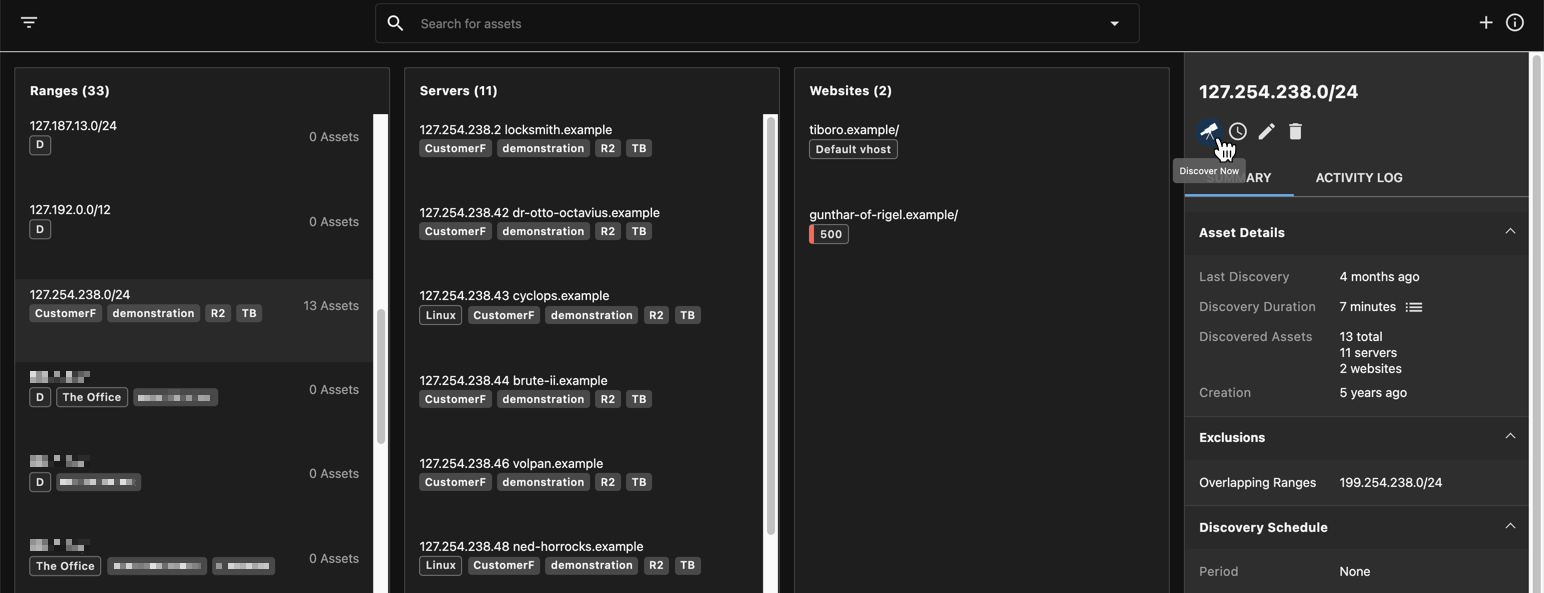
- Select the Discover Now icon, which becomes a Cancel Scan icon as the discovering process starts.
- Select the Cancel Scan icon if you want to stop the scanning process.
Tip
You will not get a notification and the Cancel Scan icon will not revert to Discover Now when the scan is finished. Refresh the page from time to time to check the actual status.

