Adding Assets Manually
This article describes how to add new assets in Secureworks® Taegis™ VDR manually.
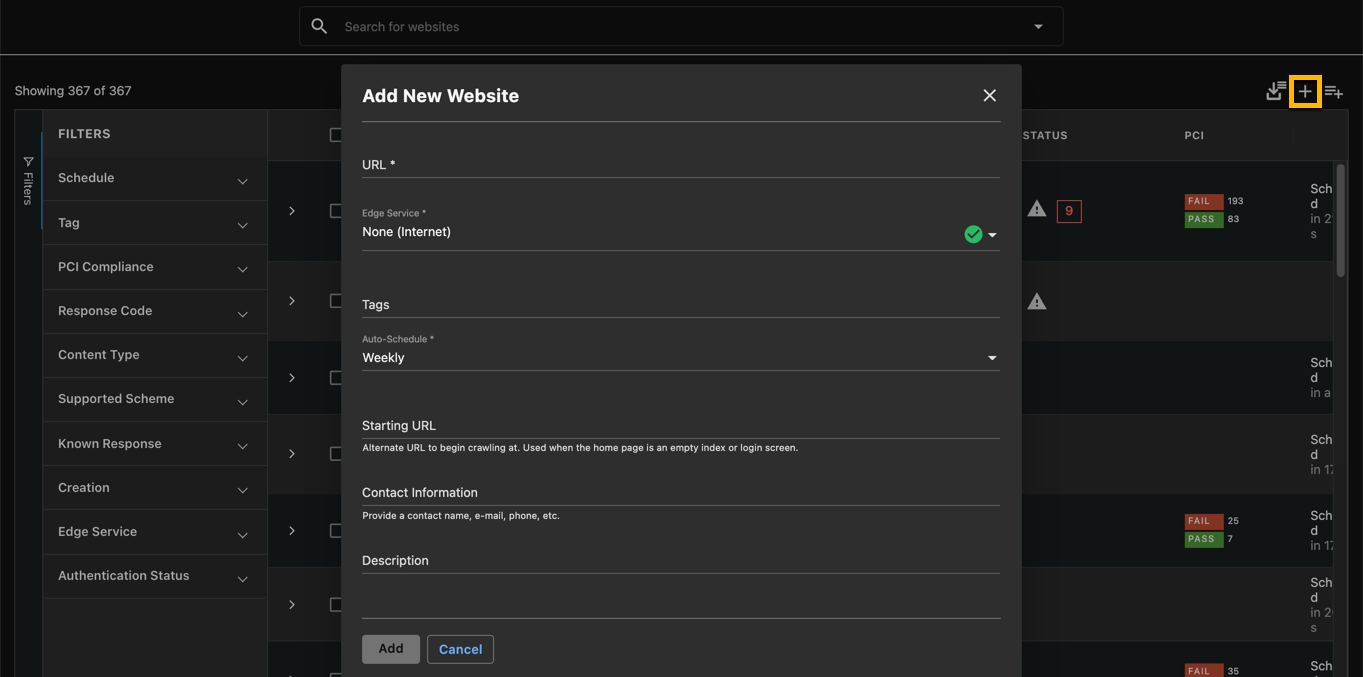
You can add assets manually in VDR by going to the Websites or Servers section and selecting the + button at the top right corner of the page. A modal appears that allows you to configure the new asset using the following parameters (menus differ slightly for Websites and Servers):

Manually Add Assets
Add a New Website Menu ⫘
- Team — By default this is the team context you are in. You can switch teams using the Team Selector in the top menu.
- URL — The URL where the website is located. The domain should be resolvable through the appropriate Edge Service (see Reaching Firewalled & Internal Assets).
- Edge Service — Specify whether your assets should be reached through an installed Edge Service or through the Internet (see Reaching Firewalled & Internal Assets).
- Tags — Select the tags to be associated with this new asset.
- Starting URL — (optional) Specify the sub-path within the website where the crawling should begin.
- Contact Information — Provide the contact information to be associated with this new asset.
- Description — Provide the description information that will be associated with this new asset.
Add a New Server Menu ⫘
- Team — By default this is the team context you are in. You can switch teams using the Team Selector in the top menu.
- IP Address or Hostname — The IP or Hostname of the server. The hostname should be resolvable through the appropriate Edge Service (see Reaching Firewalled & Internal Assets).
- Edge Service — Specify whether your assets should be reached through an installed Edge Service or through the Internet (see Reaching Firewalled & Internal Assets).
- Tags — Select the tags to be associated with this new asset.
- Contact Information — Provide the contact information to be associated with this new asset.
- Description — Provide the description information that will be associated with this new asset.
Once you have entered the information in the modal, select the Add button to begin validating the newly created asset. If the validation process is successful the Scan Now option will appear, allowing you to manually launch a scan.
During the verification process, the asset will show a Validate icon in the Status column.
Failure to validate is generally caused by three main problems:
- The website is not responding.
- The hostname cannot be resolved.
- The Edge Service through which the asset is to be reached is not connected.
Select the icon to request a re-validation of the asset.
Tip
If the validation process is successful, the Scan Now option appears, allowing you to manually launch a scan. If you do not see Scan Now and only the Validate option appears, it is an indicator that the web application endpoint is not providing a valid HTTP response.
Bulk Asset Import ⫘
Note
Details of the results following a bulk import are accessible in the Activity Log, accessible by selecting the Account circle from the upper right corner on the Main Menu.
Add assets using bulk import by navigating to the Websites or Servers section and following these steps:
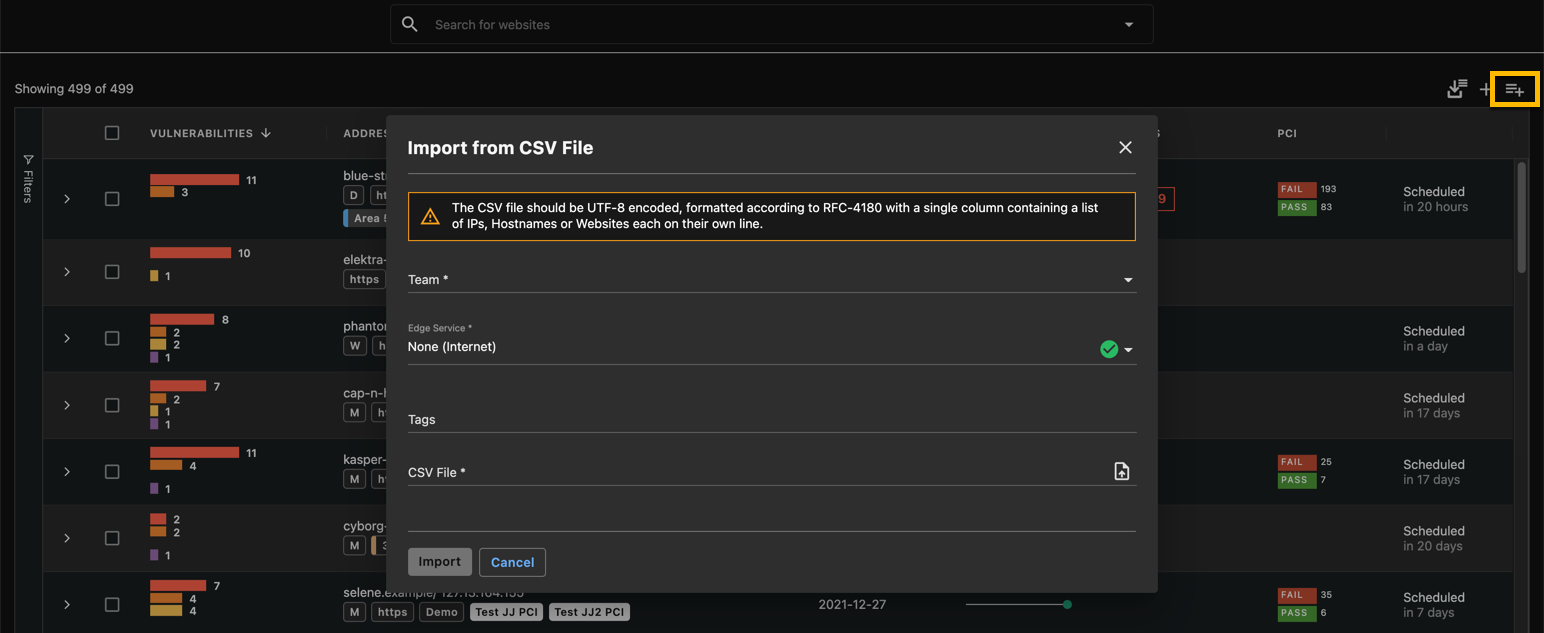
- Select the Import from CSV icon at the top right corner of the page. The Import from CSV File modal displays.

Bulk Asset Import
- Edge Service — Specify whether your assets should be reached through an installed Edge Service or through the Internet (see Reaching Firewalled & Internal Assets).
- Tags — Select the tags to be associated with the new assets.
- Select Choose File to browse to a CSV file containing a list of assets (IPs, hostnames, or websites) to be imported in bulk. The CSV file should be UTF-8 encoded and RFC-4180 formatted in a single column (additional columns will be ignored) containing a list of IPs, hostnames, or websites, each on their own line.
- Once the CSV file is ready to be imported, select Submit to start the import process.
A message in the bottom left corner indicates that the import process has started.
Assets will soon begin appearing in the respective Websites and/or Servers section.
Once the import process is complete, a message in the bottom left corner indicates "Import Completed."
Note
To perform a bulk import of IP Ranges via the API, see Bulk Importing IP Ranges.
