Manage Users
Users with the required role can manage the users of their Secureworks® Taegis™ XDR tenant via Manage Users. To access:
- From the XDR left-hand side navigation, select Tenant Settings → Users.
- Manage Users displays.
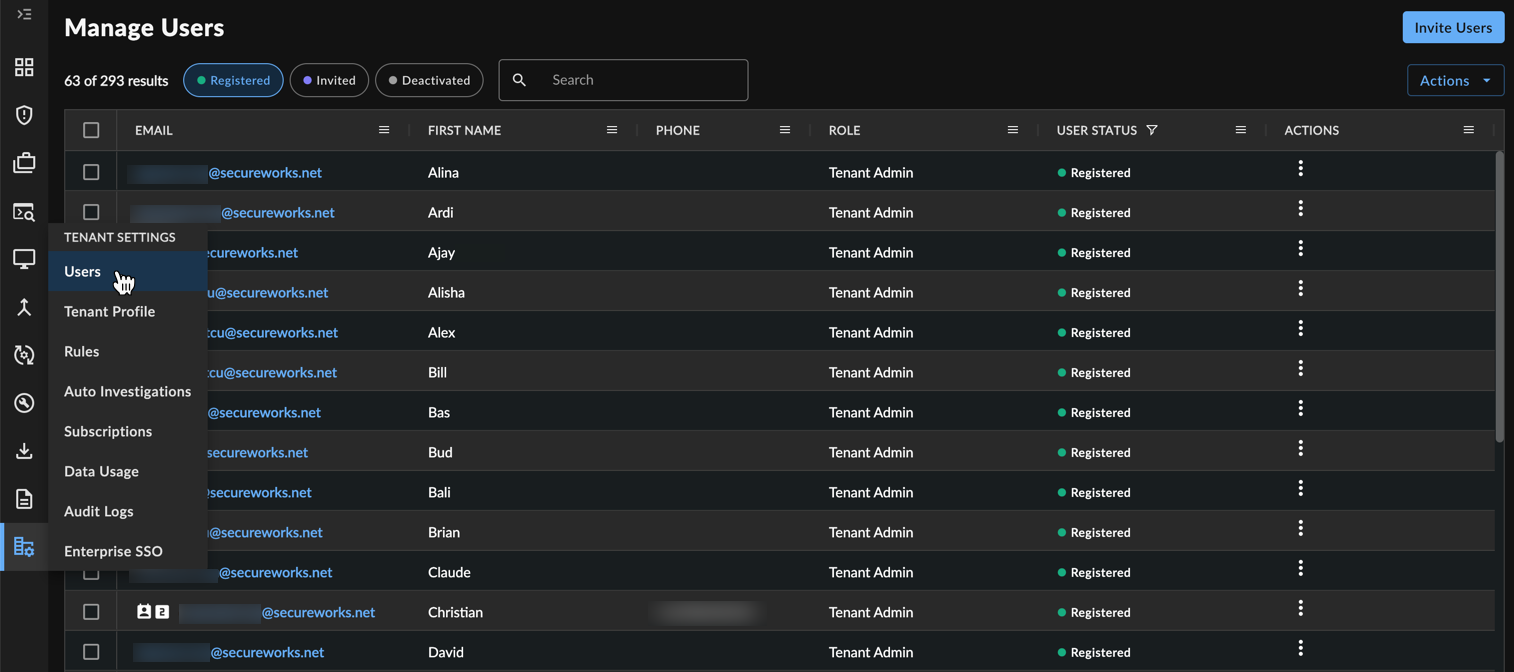
Manage Users
Find Users ⫘
Existing registered, invited, and deactivated users display in the table on this page.
Points of Contact ⫘
Users who are added as points of contact in the Tenant Profile escalation list are identified with an icon and their escalation order in the Manage Users table.
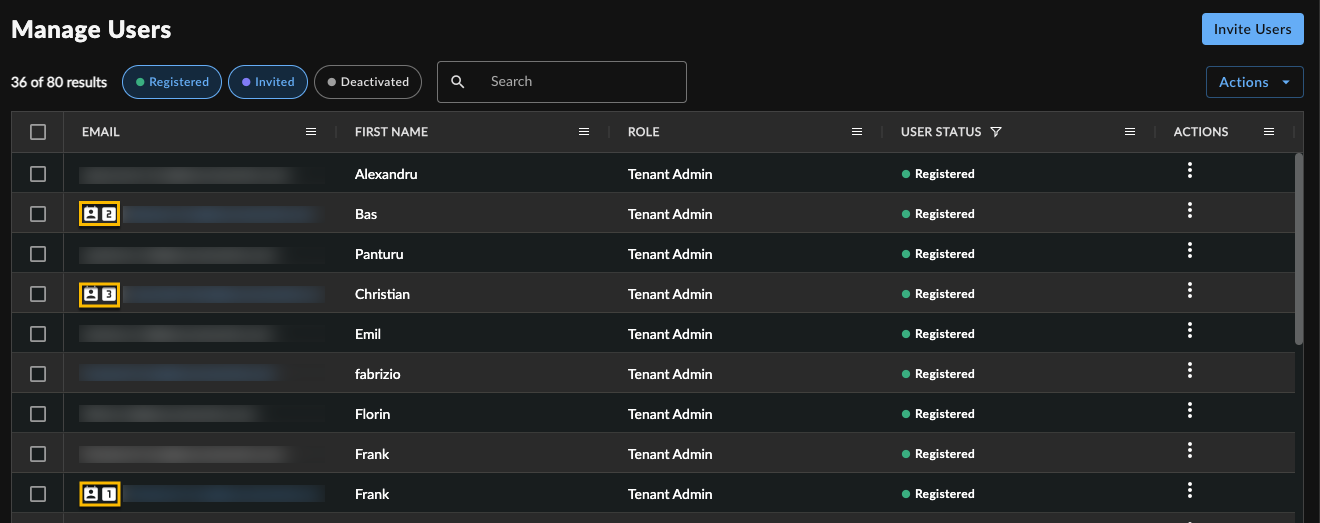
Points of Contact
Filter the Table ⫘
- Filter the table of users using the user status filters above the table to show only registered, invited, or deactivated users, or a combination. By default, the table displays registered and invited users.
- Type into the quick-search bar above the table to filter by your value.

Filter Table
Filter Columns ⫘
- Select a column header to sort A-Z ascending or descending by that column.
- Select the menu icon next to any column header and choose the filter icon to filter that column. You can:
- Type into the search bar to filter by a specific value.
- Select or deselect the entries you would like to be present.
- Once applied, remove text from the filter search bar and re-select all entries to return to an unfiltered view.
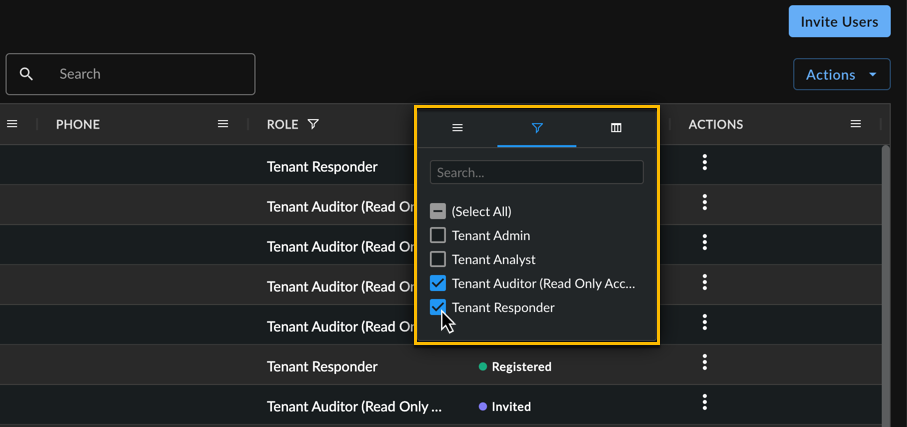
Filter Columns
Invite Users ⫘

Important
Email invitations are sent via AWS Mail. Please ensure that the domain mail.amazonses.com is not blocked locally to avoid issues with delivery.
To invite new users to your tenant:
- From the XDR left-hand side navigation, select Tenant Settings → Users.
- Select Invite Users. The Invite New Users form displays.
- Enter the user’s email address, assign them a user role, and select a language.
- Select Add Another User to add multiple users at a time.
- Select Invite. Each user receives an email invitation with registration instructions.

Inviting New Users
Note
Invitations expire 48 hours after they are sent. If an error message like user ticket is in invalid status displays when you register, you will need a new invite.
Re-invite Users ⫘
If a user has not registered their account after receiving an invitation, you can send them another invitation:
- From the XDR left-hand side navigation, select Tenant Settings → Users.
- Filter the table to find the desired user, if needed.
- From the Actions column on the row of the target user, select the vertical ellipsis to open the context menu.
- Select Re-invite User.
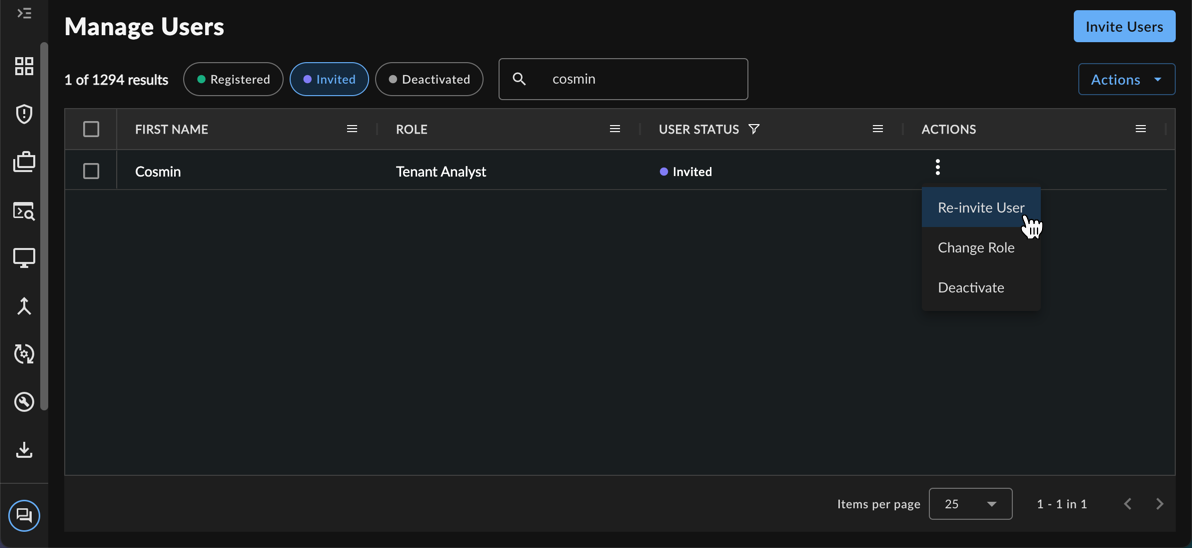
Re-invite User
- From the Re-invite User modal, adjust the role if needed and then select Re-invite.
Edit User Roles ⫘
To edit a user’s role:
- From the XDR left-hand side navigation, select Tenant Settings → Users.
- Filter the table to find the desired user, if needed.
- From the Actions column on the row of the target user, select the vertical ellipsis to open the context menu.
- Select Change Role.
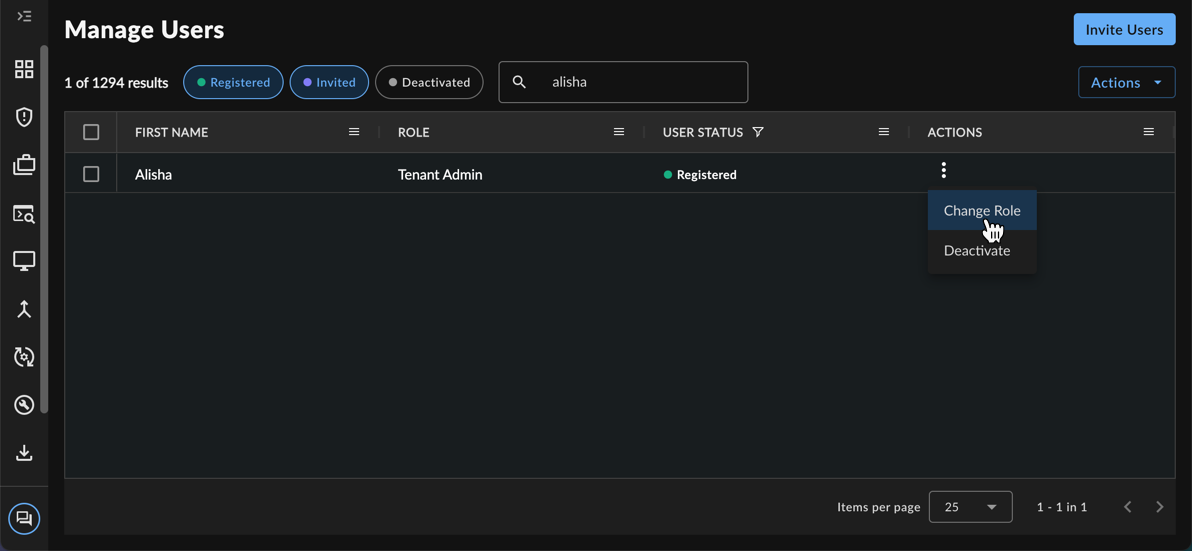
Change a User’s Role
- From the Edit Role modal, choose the desired user role and select Update.
Edit User Emails ⫘
To edit a user’s email address:
- From the XDR left-hand side navigation, select Tenant Settings → Users.
- Filter the table to find the desired user, if needed.
- Select the address from the Email column for the desired user.
- From the Edit User Email modal, edit the address and select Save User.
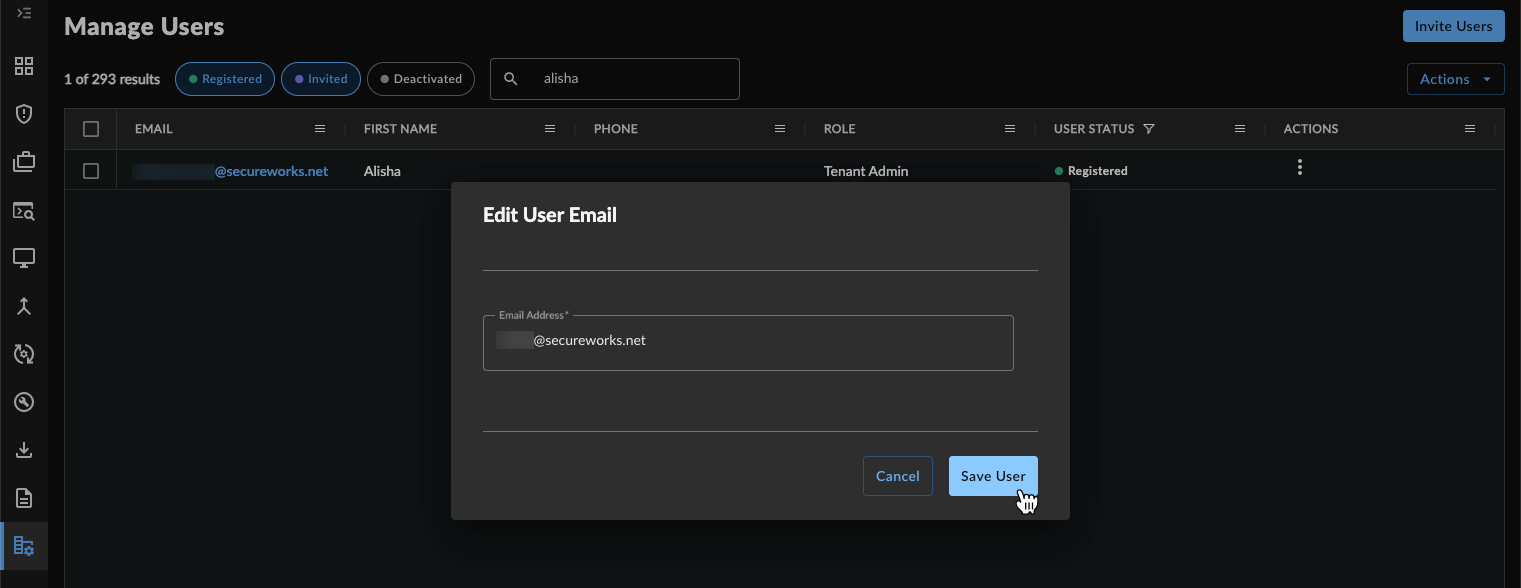
Edit a User’s Email
Important
- A user's existing multi-factor authentication must be reset after their email address is updated, but a password change is not required.
- An email notification of the change is sent to both the old and new addresses after the update.
Deactivate Users ⫘
To deactivate a user and remove them from your tenant:
- From the XDR left-hand side navigation, select Tenant Settings → Users.
- Filter the table to find the desired user, if needed.
- From the Actions column on the row of the target user, select the vertical ellipsis to open the context menu.
- Select Deactivate.
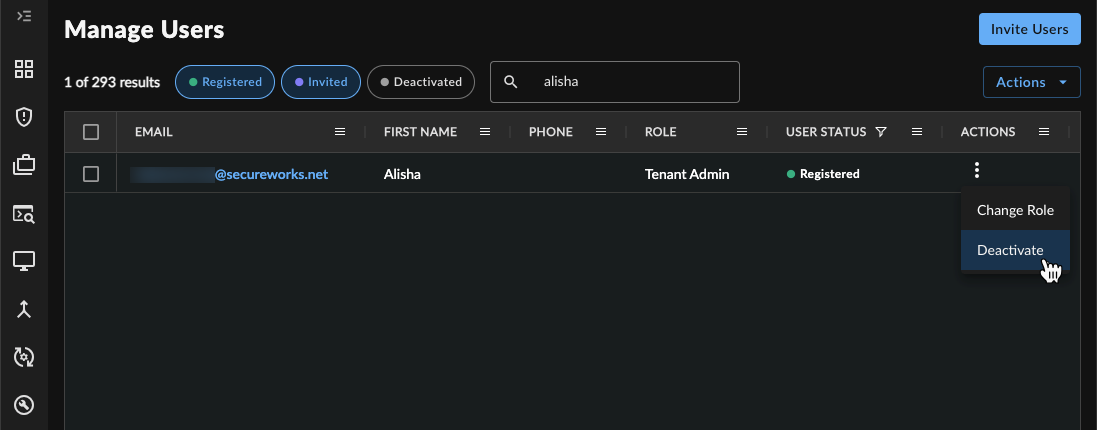
Deactivate a User
- On the confirmation dialog box, confirm that you wish to deactivate the user by selecting Deactivate.
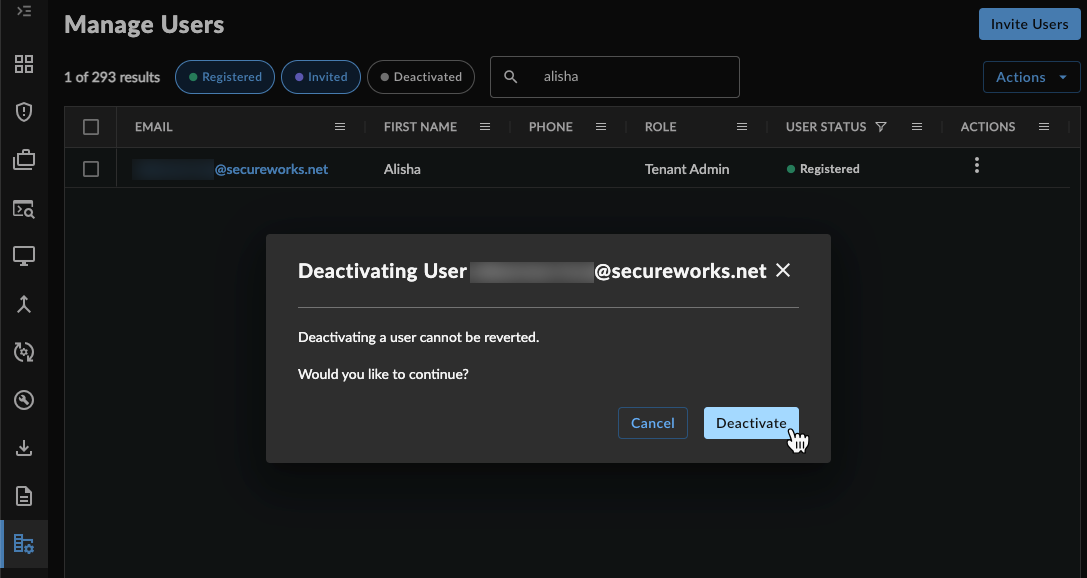
Confirm Deactivation
Important
Once a user is deactivated, they appear as Deactivated in the Manage Users table. To give them access again, you must reactivate them.
Note
Users who are set as points of contact must be removed as points of contact before they can be deactivated.
View Deactivated Users ⫘
To view users that have been removed from your tenant:
- From the XDR left-hand side navigation, select Tenant Settings → Users.
- Select the Deactivated filter and unselect the Registered and Invited filters. The table displays only deactivated users.
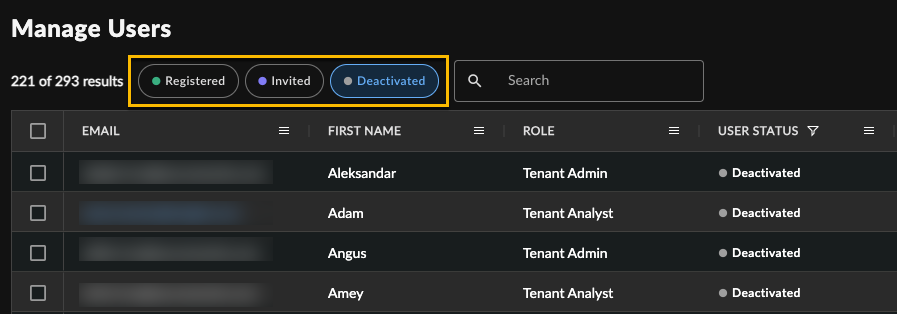
View Deactivated Users
Reactivate Users ⫘
To reactive a user that was previously deactivated:
- From the XDR left-hand side navigation, select Tenant Settings → Users.
- Select the Deactivated filter and unselect the Registered and Invited filters. The table displays only deactivated users.
- From the Actions column on the row of the target user, select the vertical ellipsis to open the context menu.
- Select Re-invite User.
- On the confirmation dialog box, select Re-invite. The user receives a Welcome Back reactivation email with a link to re-register that is good for seven days.
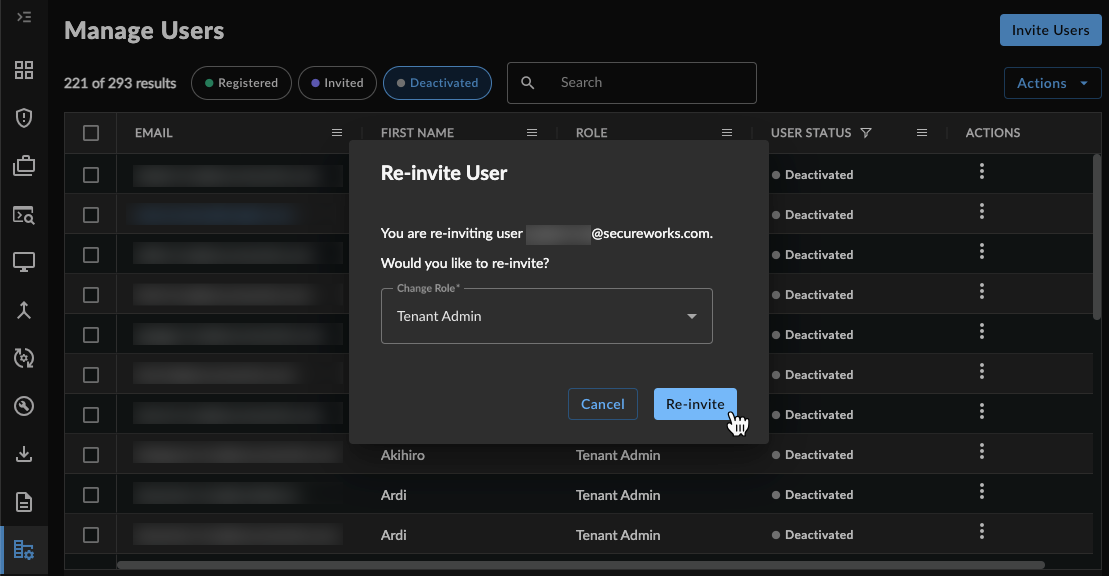
Reactivate User
Export Users as CSV ⫘
You can export the Manage Users table or selected rows to a CSV file, based on the selected filters.
Export All ⫘
To export all users to CSV:
- Filter the table, if necessary.
- From above the table, select Actions → Export All as CSV.
- Proceed to Data Exports to download the finished CSV file.

Export All
Export Selected ⫘
To export selected users to CSV:
- Filter the table, if necessary.
- Select the check boxes of the users you want to export.
- From above the table, select Actions → Export Selected as CSV.
- Proceed to Data Exports to download the finished CSV file.

Export Selected
