Connector Library
automation connectors connections
The Connector Library tab of Connectors displays all available connector templates, which can then be used to create new connections.
Note
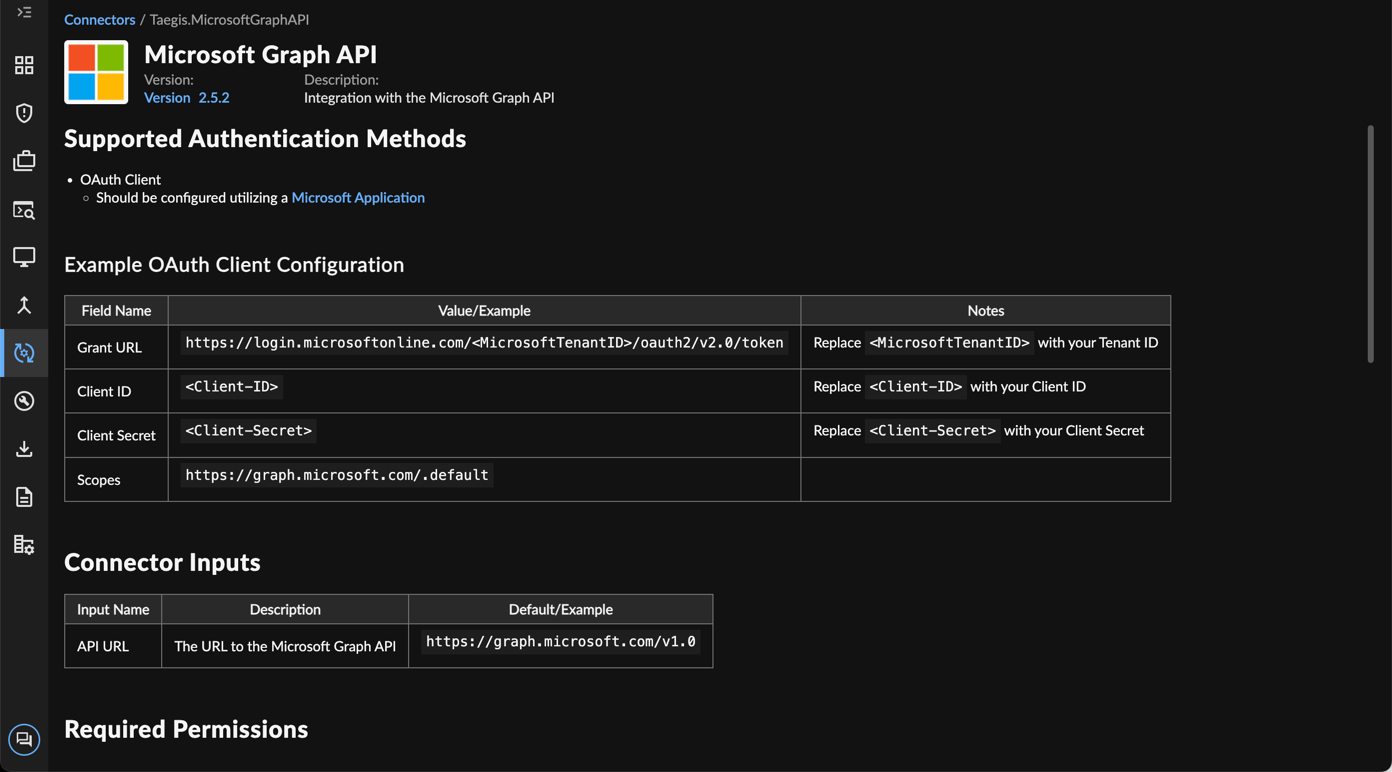
Each connector has built-in documentation that outlines the requirements for the connector type. Select Documentation from a connector or configured connection in XDR to open this in a new tab.
View Available Connectors ⫘

Viewing Available Connectors
To view all available connectors, select Automations from the left-hand side navigation of Secureworks® Taegis™ XDR, choose Connectors, and select the Connector Library tab.
You can view them in a table or in a grid of cards. More information is available in the table view; hover over any column heading and select the menu icon to adjust columns and add or remove displayed columns. Drag the columns to adjust their width.
Start typing in the search bar to search for a template by name.
View a Connector’s Details ⫘
To view details of a connector, select it from the Connector Library tab.

Itemized Connector Details
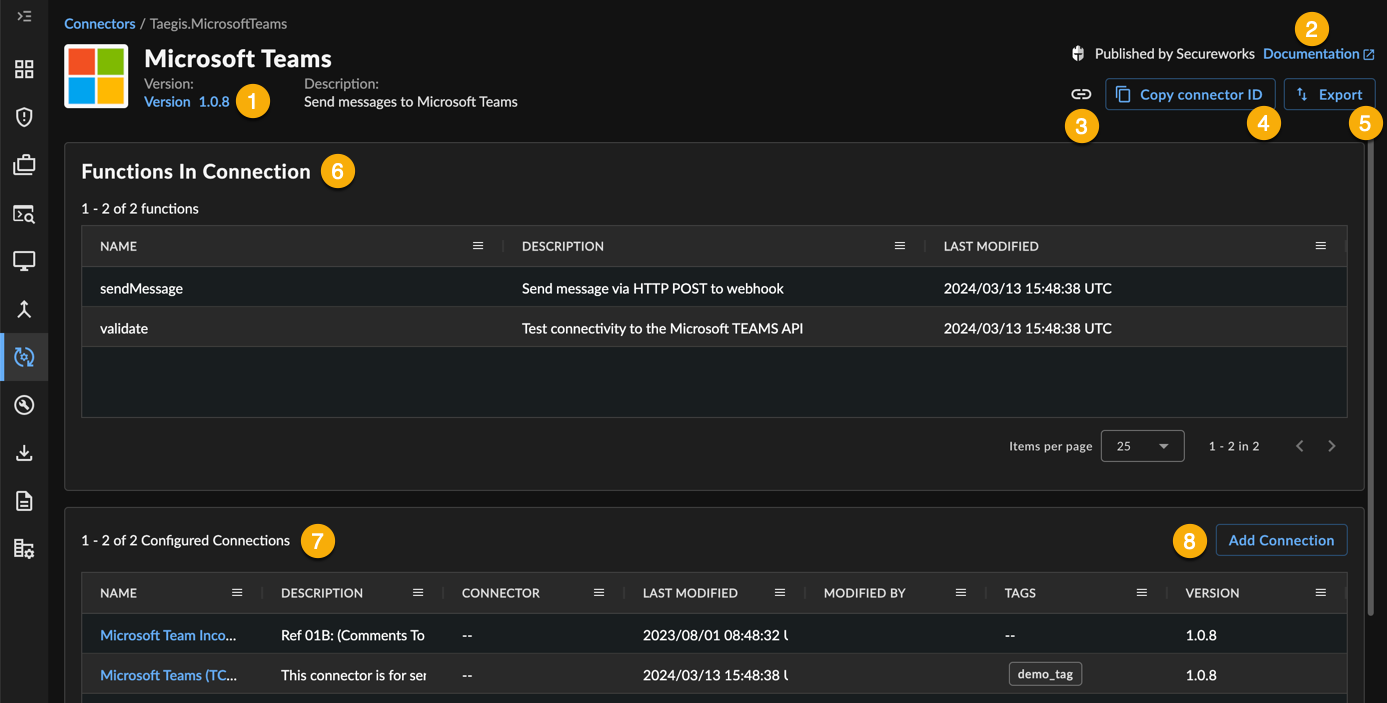
Connector details include:
- Version — The default version of the connector, as well as a link to manage versions. See Connector Versions for more.
- Documentation — A link to the connector requirements. See Create a New Connection for more.
- Copy Share Link — Copy a direct link to this connector.
- Copy Connector ID — Copy the ID for this connector.
- Export — A link to export the connector definition. See Export a Connector for more.
- Functions in Connection — A table of all the actions that the connector supports.
- Configured Connections — Links to already configured connections.
- Add Connection -- A link to create a new connection.
Create a New Connection ⫘

Creating a New Connection
To create a new connection:
- Open the Connector Library tab.
- Select the desired connector.
- From the connector details, select Add Connection. The Add a Connection side panel displays.
- Follow the prompts to configure the connection.
Note
Each connector has built-in documentation that outlines the requirements for the connector type. Select Documentation from a connector or configured connection in XDR to open this in a new tab.

Viewing Connector Documentation
Options for Authentication ⫘
Supported authentication options vary by connector type. These may include:
- API Key
- Basic Authentication
- Platform
- OAuthClientCreds
- LDAP
Config / On-Premise Configuration ⫘
Add the On-Premise Automation Connector to a data collector in order to enable automation on on-premise technologies, such as Atlassian Jira. For more information, see On-Premise Automation Connector.
Clone a Connector ⫘
To clone a connector:
- Select the name of the desired connector from the Connector Library.
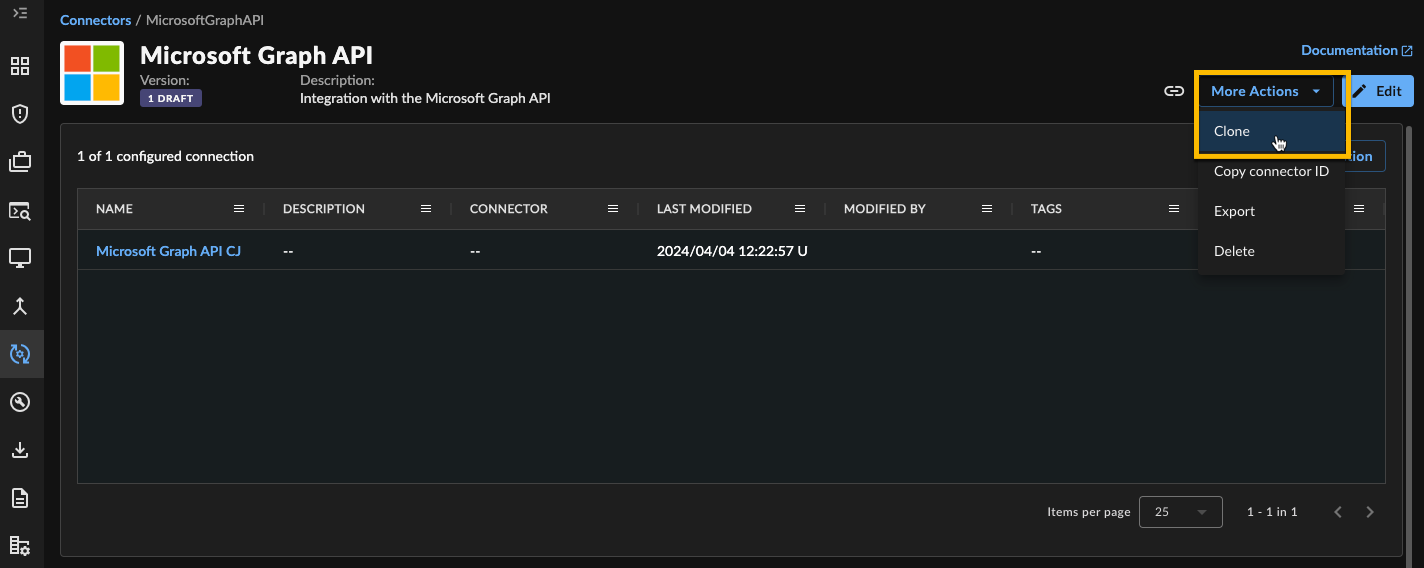
- From the connector details page, select More Actions > Clone.
- In the clone modal that is displayed, enter a new name for the template. Names must be unique and can only contain letters (A-Z, a-z), numbers (0-9), and underscores ( _ ). Once set, it cannot be changed.
- (Optional) Enter a title/display name for the connector.
- Select Clone.

Clone a Connector
Import a Connector ⫘
You can upload your own connector using a YAML file. To import a connector:
- Open the Connector Library tab.
- Select Import.
- Select the YAML file to upload.
- Proceed through the configuration steps.

Import a Connector
Export a Connector ⫘
To export a connector’s details as a YAML file:
- Open the Connector Library tab.
- Select the desired connector.
- From the connector details page, select Export. A YAML file is downloaded.
