Okta Integration Guide
The following instructions are for configuring an Okta integration to facilitate log ingestion into Secureworks® Taegis™ XDR.
Note
Integrating Okta enables XDR to enhance monitoring data via Okta. It is not used for SSO into XDR.
Okta Requirements ⫘
An active Okta account with the Super Admin role is required to create a service app.
Data Provided from Integration ⫘
| Auth | CloudAudit | DNS | HTTP | Netflow | NIDS | Process | Thirdparty | |
|---|---|---|---|---|---|---|---|---|
| Okta | D | Y |
Y = Normalized | D = Out-of-the-Box Detections | V = Vendor-Specific Detections
Note
XDR detectors are not guaranteed to be triggered, even if a data source's logs are normalized to a schema associated with a given detector. However, you can create Custom Alert Rules to generate alerts based on normalized data from a data source.
Create the Service App in Okta ⫘
The following is required to add the Okta integration in XDR:
- Integration name
- Org URL — Refer to the vendor's documentation to find this value
- Client ID
- Key ID of the Public Key added for the Service App
- RSA Private Key in PEM format
Procedure ⫘
- Create a service app integration in the Okta Admin console.
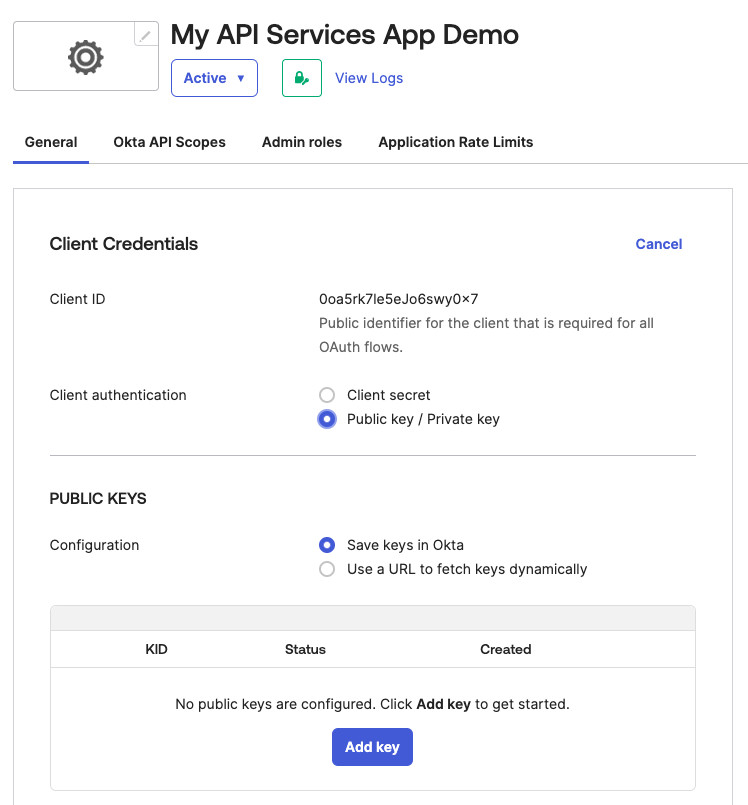
Create the Service App
- Use the following settings:
- Client Authentication — Public Key / Private Key
- Public Key Configuration — Save keys in Okta
- Generate a JWK key pair or use an existing key pair.
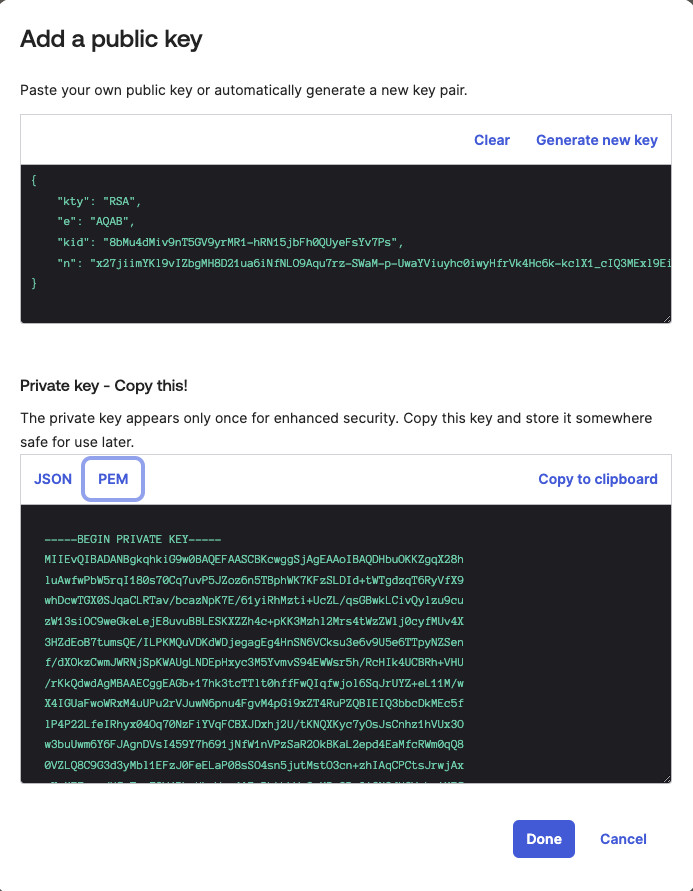
Create the Key Pair
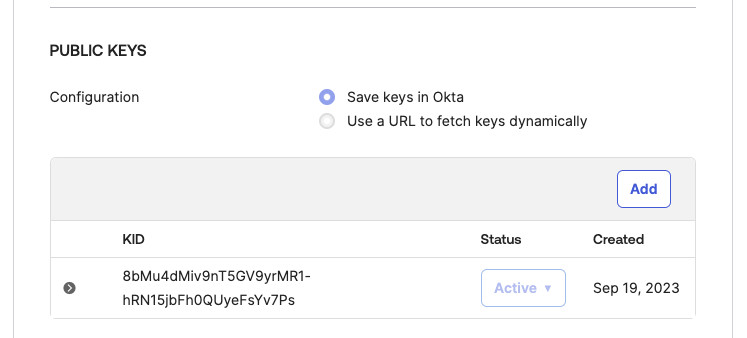
Add the Key Pair
- Grant allowed scopes. The
okta.logs.readscope is required.
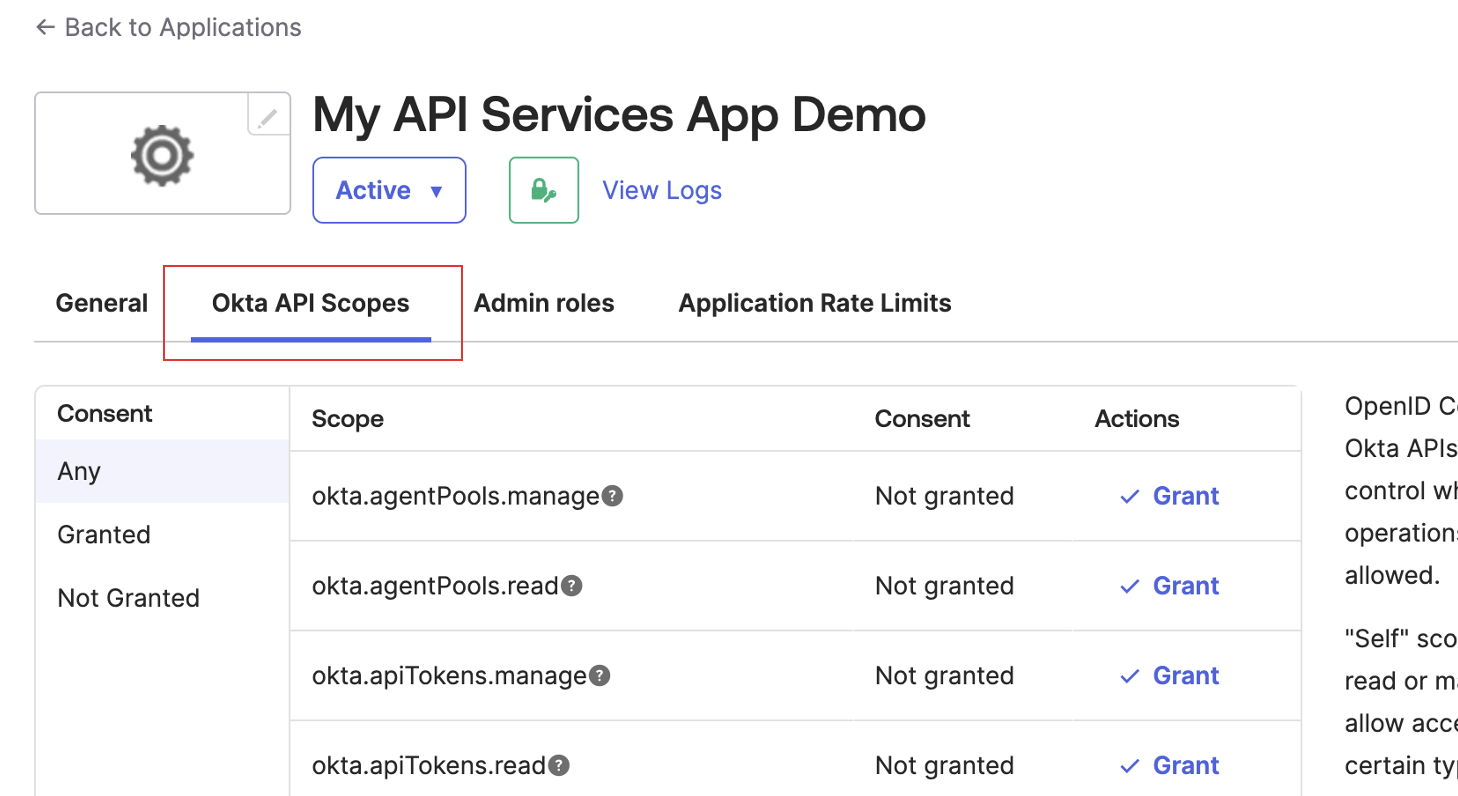
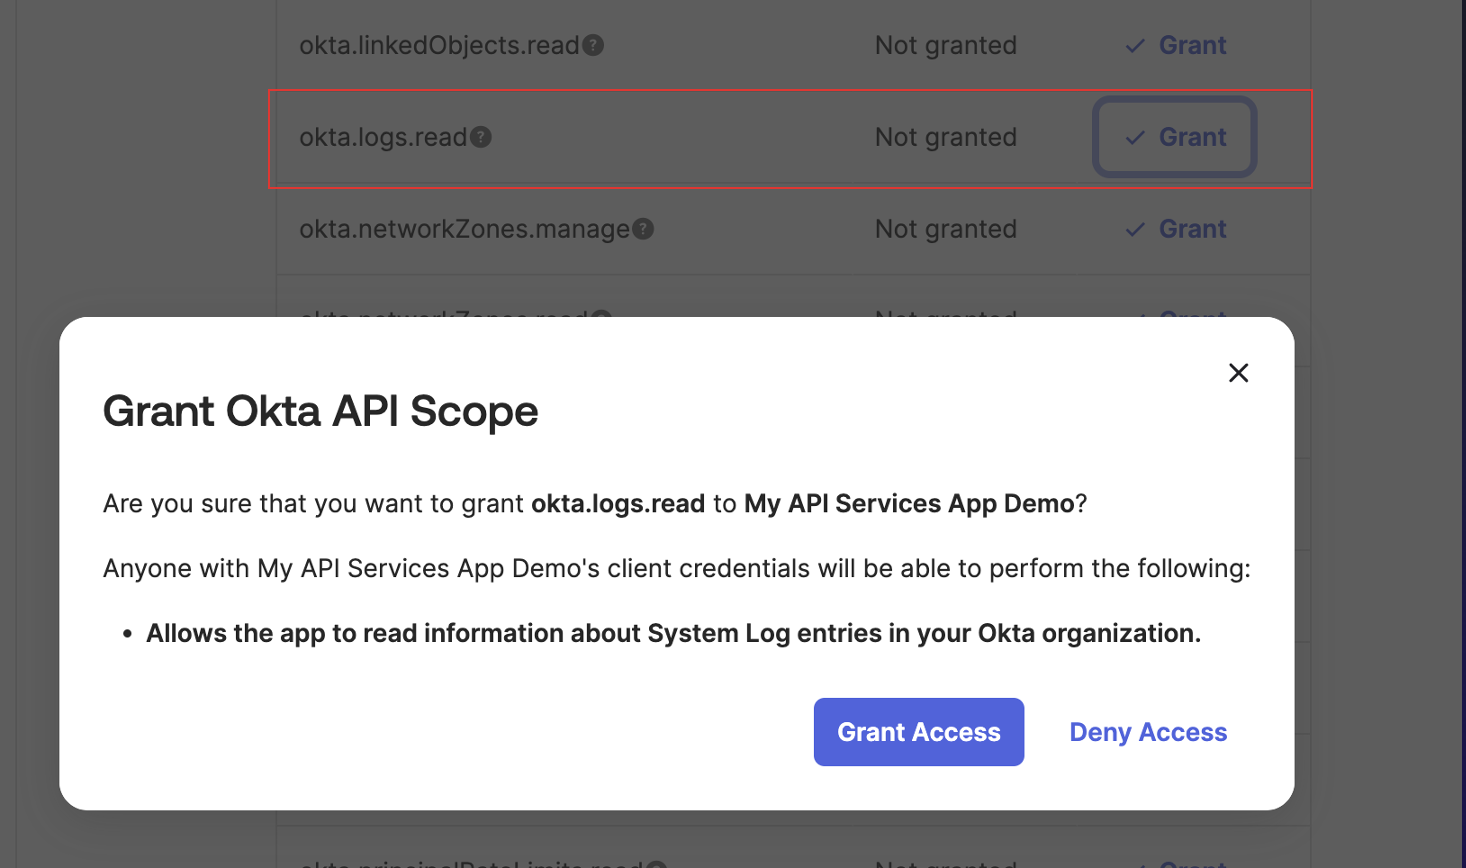
Grant the Required Scope
- Assign admin role. The
Report Administratorrole is required.

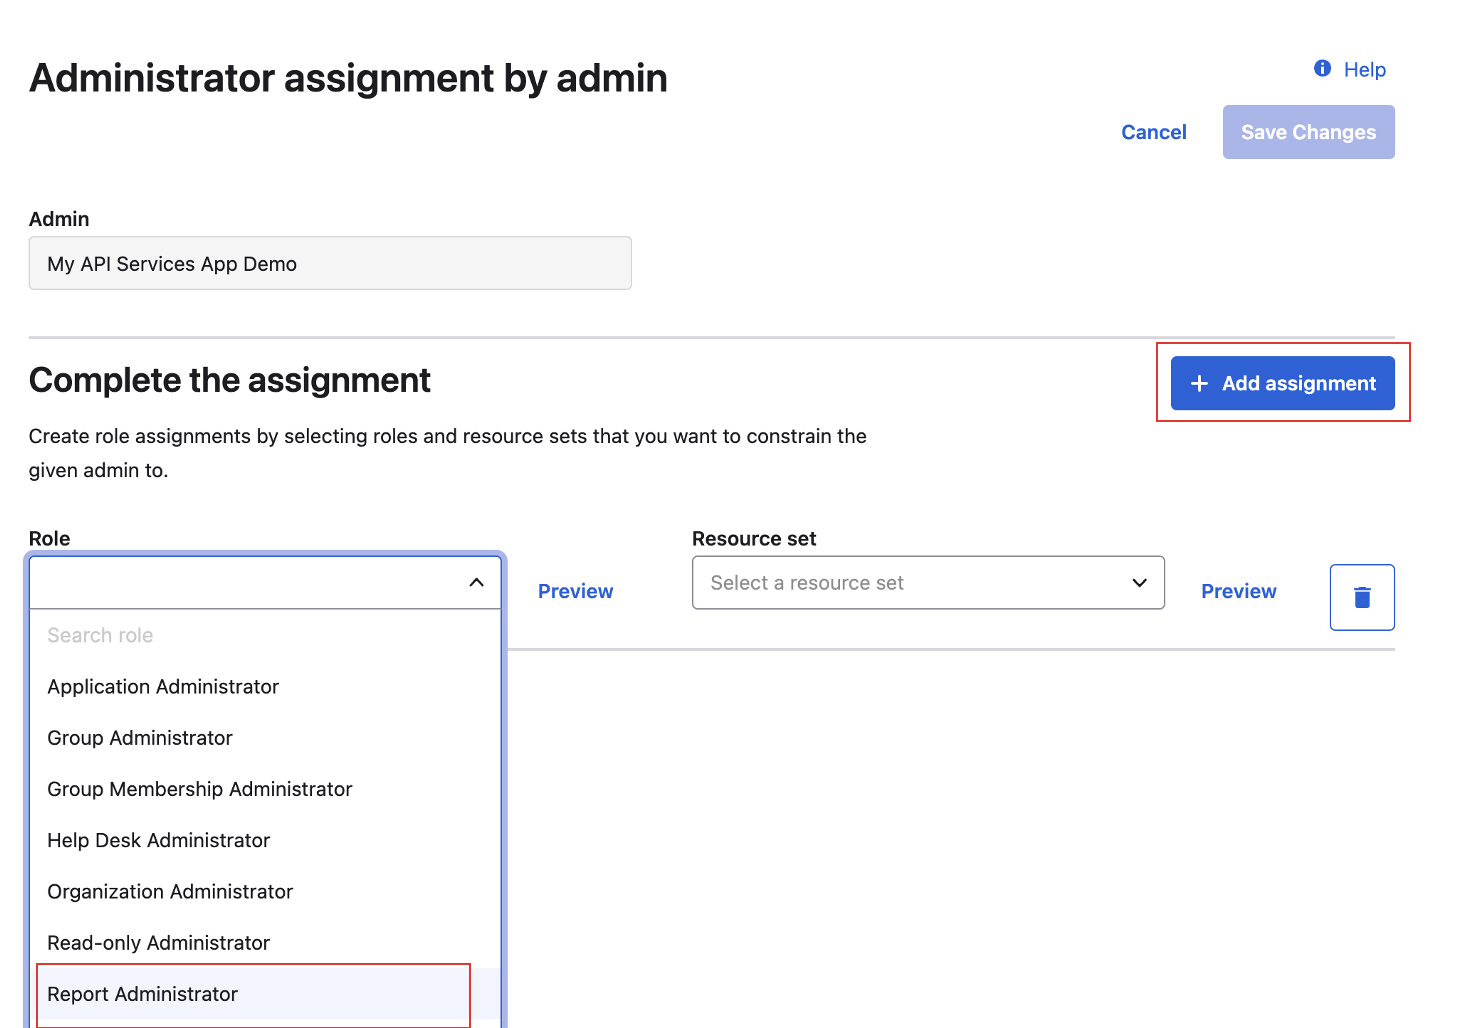
Grant the Required Role
Add Integration in XDR ⫘
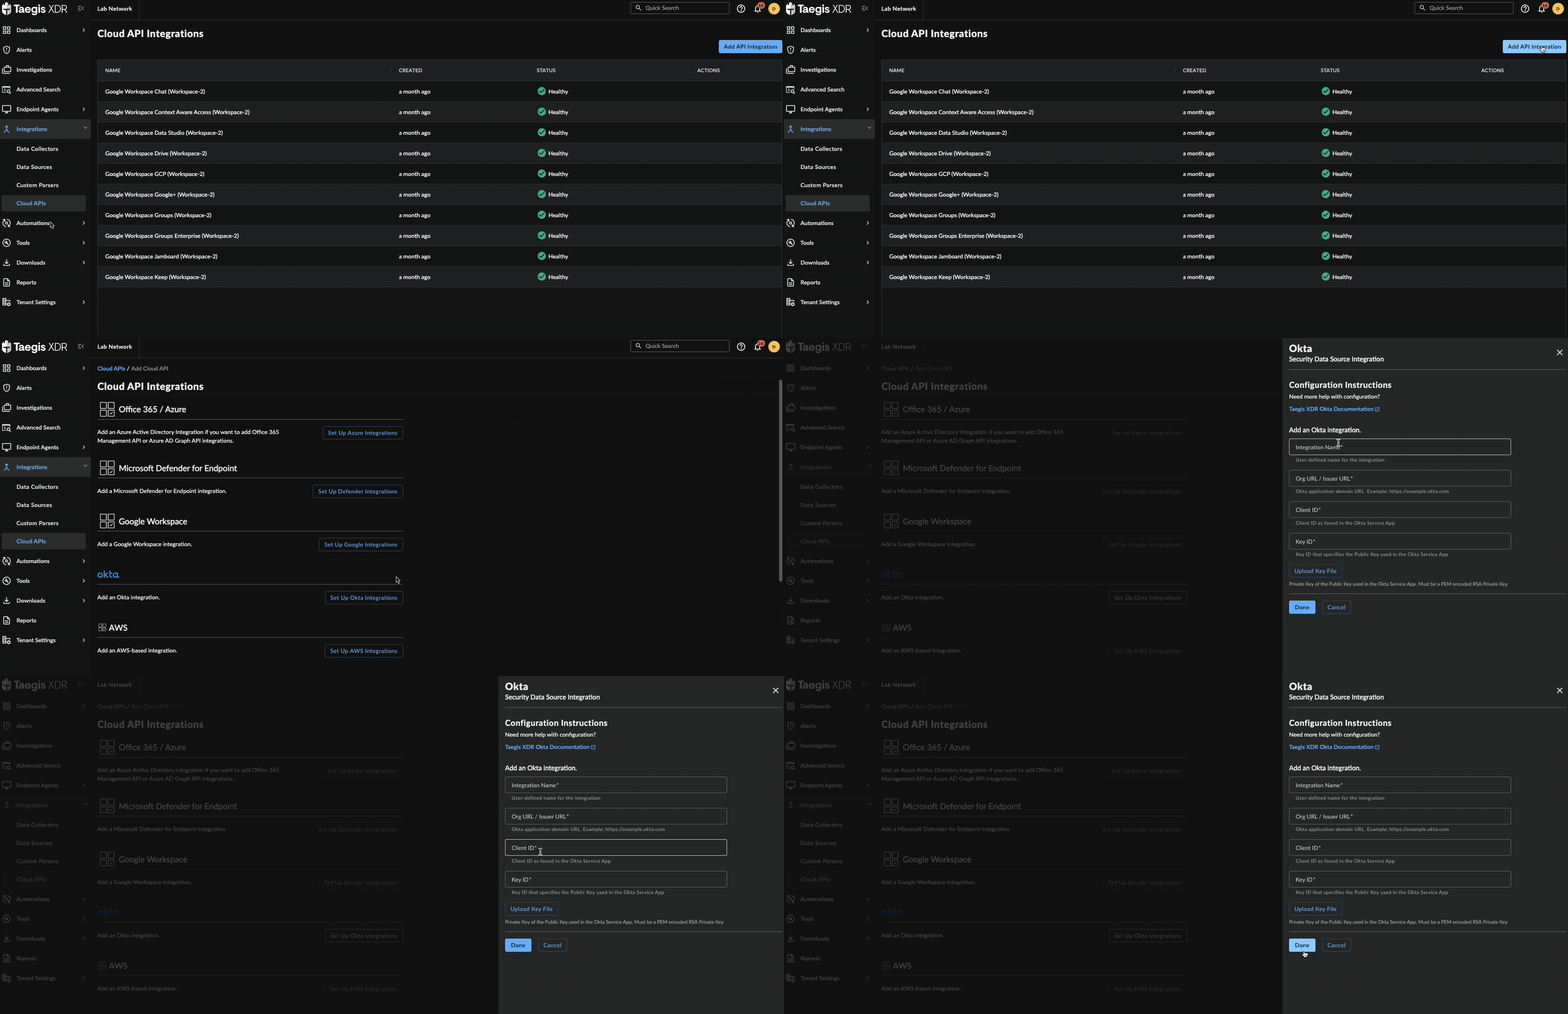
Create the Integration
- From the XDR left-hand side navigation, select Integrations → Cloud APIs → Add API Integration.
- Choose Set up Okta Integrations.
-
Enter the following fields:
- Integration Name — Any unique string
- Org URL/Issuer URL — The URL instance of your Okta account
Note
The Org URL is found in your browser’s address bar after logging in to your Okta portal and takes the format
https://xxxxxxxx.okta.com,https://xxxxxxxx.okta-emea.com, orhttps://xxxxxxxx.oktapreview.com.- Client ID — Generated when the service app was created
- Key ID (KID) — KID that specifies the Public Key used when the service app was created
-
Upload the Private Key created in the previous section.
-
Select Done. The Manage Integrations page displays with the successfully added Okta integration listed under Cloud API Integrations.
Tip
You can use the Integration Name defined in step 3 above to identify the integration within the Cloud API Integrations table.
Events Received from Okta ⫘
The following ingest events are received from Okta integrations and normalized to the auth schema:
policy.lifecycle.activatepolicy.lifecycle.createpolicy.lifecycle.deactivatepolicy.lifecycle.updatepolicy.rule.addpolicy.rule.deactivatepolicy.rule.updateuser.account.privilege.grantuser.account.reset_passworduser.account.update_profileuser.mfa.factor.activateuser.mfa.factor.deactivateuser.mfa.factor.reset_alluser.session.clearuser.session.enduser.session.startsystem.sms.send_phone_verification_messagesystem.voice.send_phone_verification_call
The following ingest events are received from Okta integrations and normalized to the cloudaudit schema:
system.api_token.createsystem.api_token.create.revokeapplication.user_membership.addapplication.user_membership.change_passwordapplication.user_membership.removeuser.session.access_admin_appuser.lifecycle.activateuser.lifecycle.createuser.lifecycle.deactivate
The following ingest events are received from Okta integrations and normalized to the generic schema:
application.provision.user.syncgroup.user_membership.addgroup.user_membership.removepolicy.evaluate_sign_onsystem.import.completesystem.import.startuser.account.report_suspicious_activity_by_enduseruser.account.update_passworduser.authentication.authenticateuser.credential.enrolluser.lifecycle.delete.initiateduser.lifecycle.reactivateuser.lifecycle.suspenduser.lifecycle.unsuspenduser.authentication.sso
Related Topics ⫘
For more detailed information about managing Okta integrations, see these related topics:
