Amazon GuardDuty Integration Guide
cloud integrations amazon guardduty aws
Secureworks® Taegis™ XDR and Amazon GuardDuty integration is only available via the Amazon GuardDuty API. Integration via Cloudwatch Events and/or S3 is not currently supported. Additionally, only one AWS account may be linked for integration. If you use the Amazon GuardDuty Master Account architecture (documented by AWS at: https://docs.aws.amazon.com/guardduty/latest/ug/guardduty_accounts.html), you should use the Account ID of the Amazon GuardDuty master account in the following steps. If you are using AWS Organizations, the Amazon GuardDuty account may be different than the AWS Organizations master account.
To integrate your Amazon GuardDuty data with XDR, you must manually create an AWS Identity and Access Management (IAM) role that grants read-only access to XDR and enter this role and your AWS account ID in XDR.
Data Provided from Integration ⫘
| Antivirus | Auth | CloudAudit | DHCP | DNS | Encrypt | HTTP | Management | Netflow | NIDS | Thirdparty | ||
|---|---|---|---|---|---|---|---|---|---|---|---|---|
| Amazon GuardDuty | V |
Y = Normalized | D = Out-of-the-Box Detections | V = Vendor-Specific Detections
Note
XDR detectors are not guaranteed to be triggered, even if a data source's logs are normalized to a schema associated with a given detector. However, you can create Custom Alert Rules to generate alerts based on normalized data from a data source.
Set Up Amazon GuardDuty ⫘
To get started, follow these steps:
Tip
As you work, it’s helpful to keep separate browser tabs open in AWS Console—one with the policy so you can find the policy you’ve created, and another for the role(s) you create.
- From the XDR left-hand side navigation, select Integrations → Cloud APIs → Add API Integration.
- Choose Set Up AWS Integrations and then select Setup under Amazon GuardDuty.
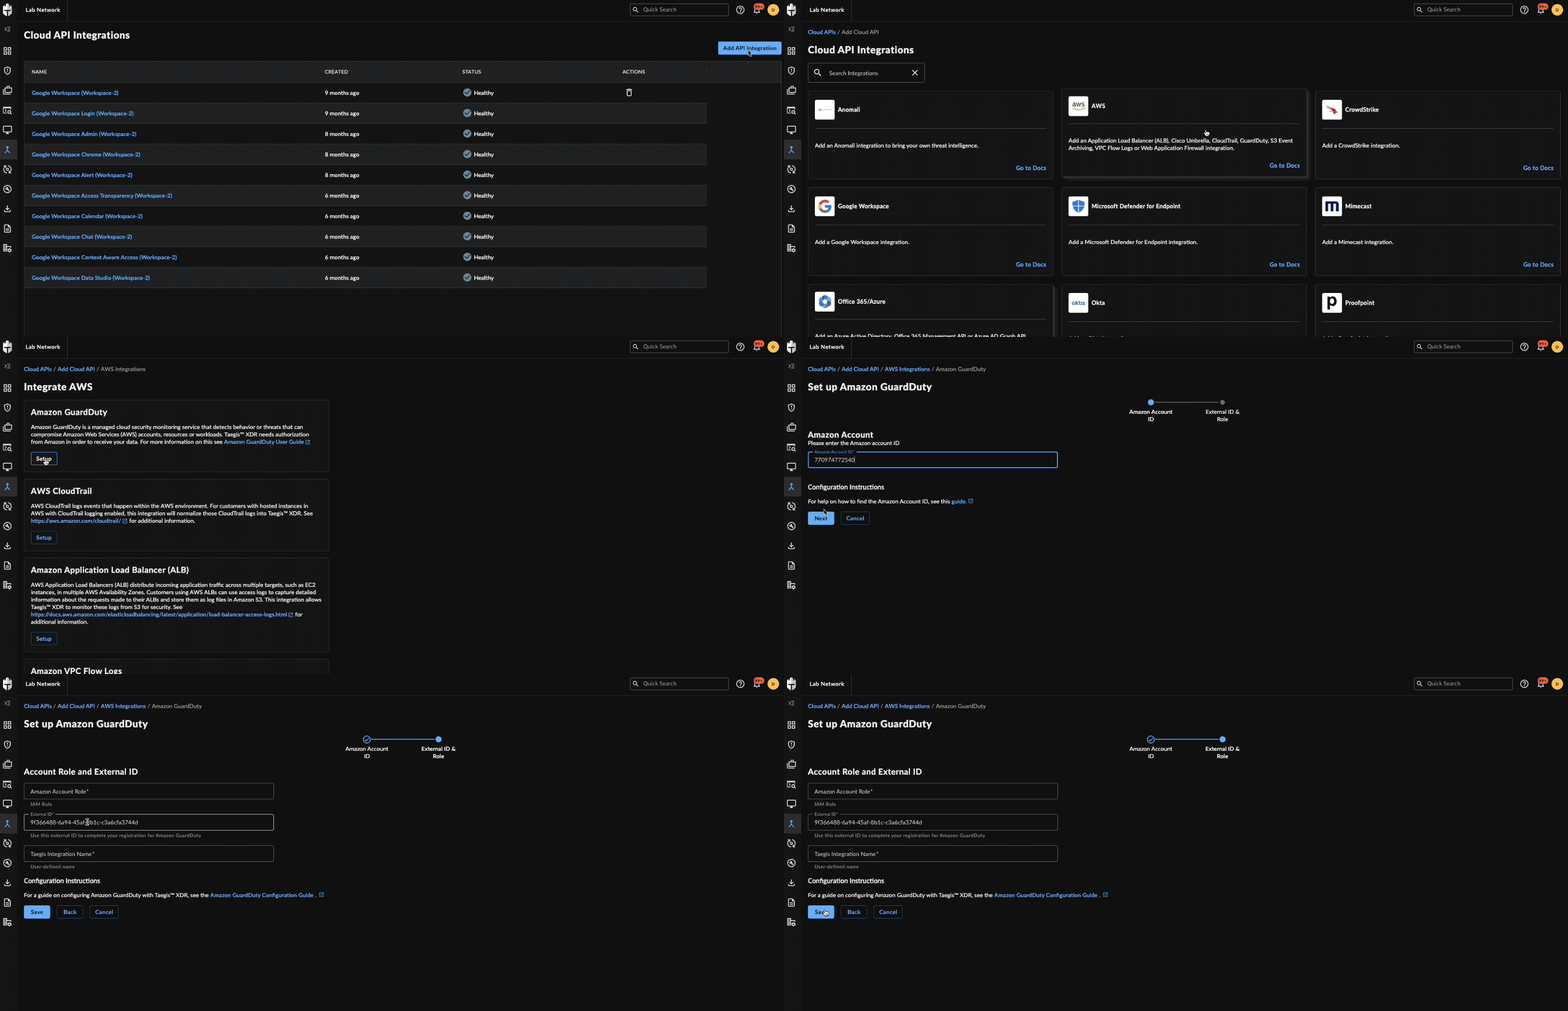
Add GuardDuty Integration
- Enter the following details:
- An identifying name for the connection
- Your Amazon Account ID
- The External ID unique to your organization; this is automatically supplied.
- An Amazon IAM Role; follow the remaining steps to generate this.
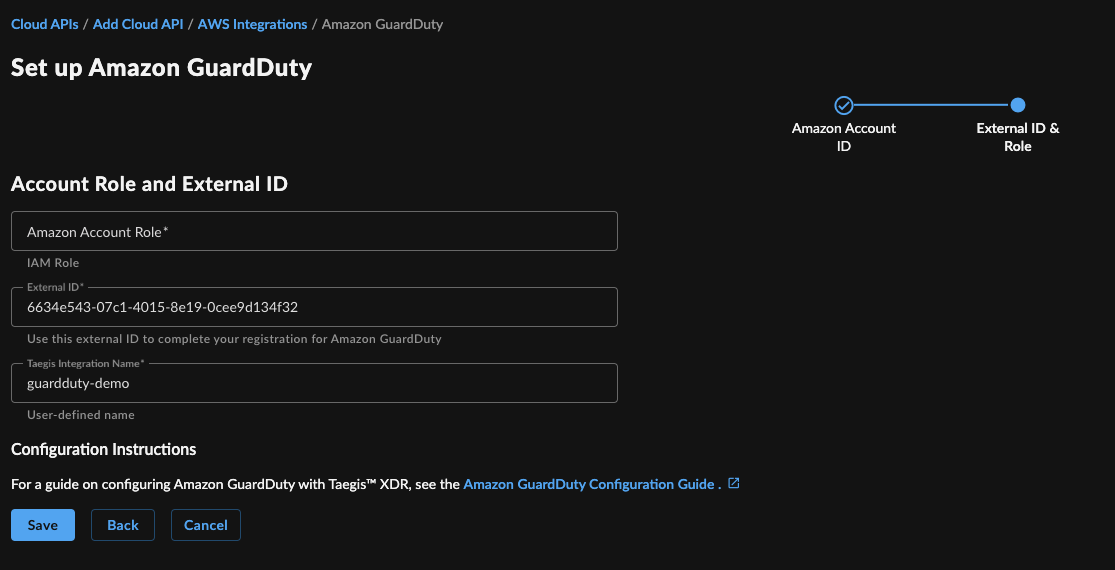
Set up GuardDuty Integration
-
Navigate to the IAM Console and ensure that you are logged in to the account you want to configure the integration for. Click Create policy.
-
Click the JSON button, then copy and paste the following policy into the form:
{
  "Version": "2012-10-17",
  "Statement": [
    {
      "Action": [
        "guardduty:ListDetectors",
        "guardduty:GetDetector",
        "guardduty:ListFindings",
        "guardduty:GetFindings",
        "guardduty:GetMasterAccount"
      ],
      "Effect": "Allow",
      "Resource": "*"
    }
  ]
}
Note
We recommend that you create an AWS role with these exact permissions and then confirm that your XDR AWS GuardDuty integration functions properly.
This policy grants read-only access to XDR for your Amazon GuardDuty data. For more information on read-only IAM roles, see the Managing Access to Amazon GuardDuty User Guide.
-
Click Next.
-
Enter a descriptive name for the policy, such as SecureworksAWSGuardDutyIntegrationPolicy, and an optional description. Click Create Policy.
-
In the IAM Console, ensure that you are logged in to the account you want to configure the integration and click Create role.
-
Select AWS account as the type of trusted entity.
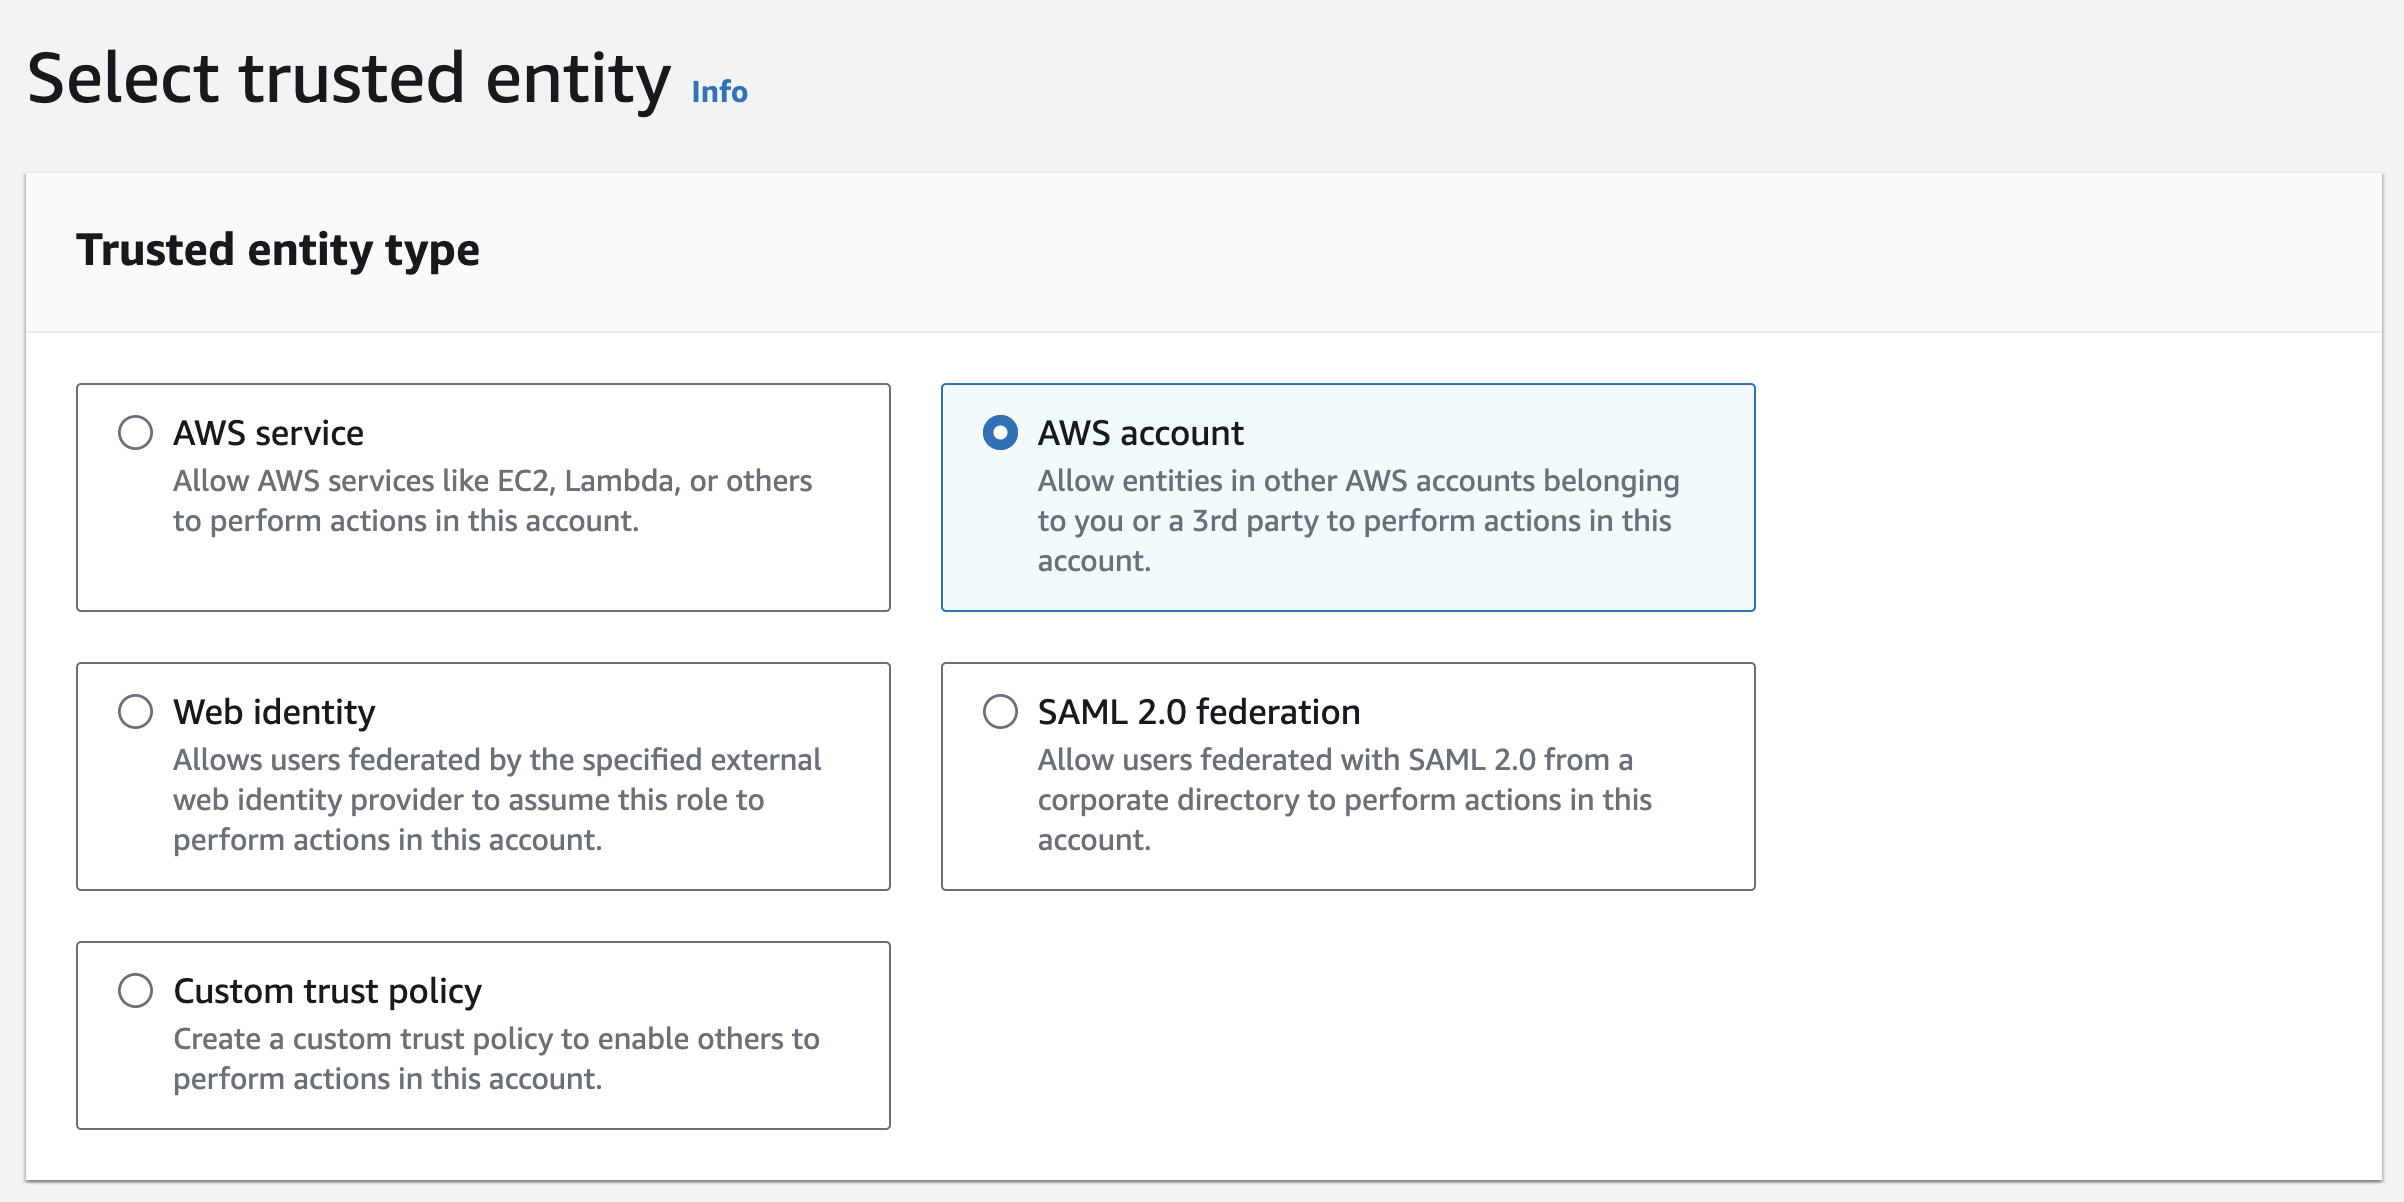
Select trusted entity
- Choose Another AWS account and enter the following Secureworks Account ID:
927866642148.

Enter Account ID
- Enable the option to Require external ID and enter the External ID displayed in XDR in Step 4.
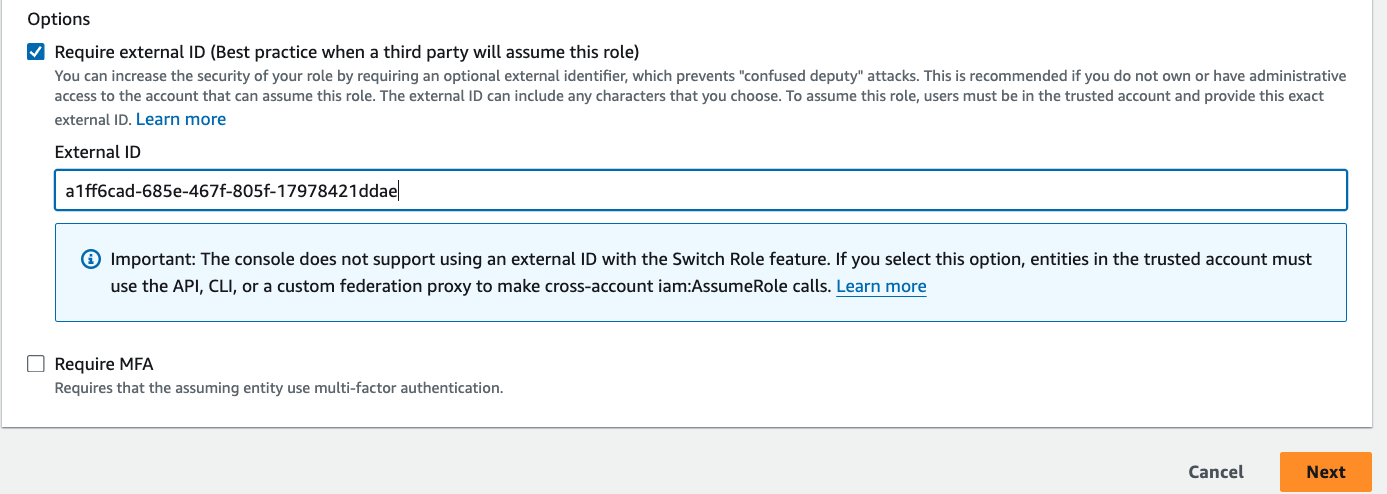
Enter Account ID and External ID
-
Leave the option to Require MFA disabled and click Next.
-
Select the name of Policy you created in the Step 8 and click Next.
-
Enter a descriptive name for the role, such as SecureworksAWSGuardDutyIntegrationRole, and an optional description. Add any optional tags desired and click Create role.
Note
Copy the Role name for use in the next step.
- Return to the Set Up page in XDR and enter the IAM Role name created in Step 15.
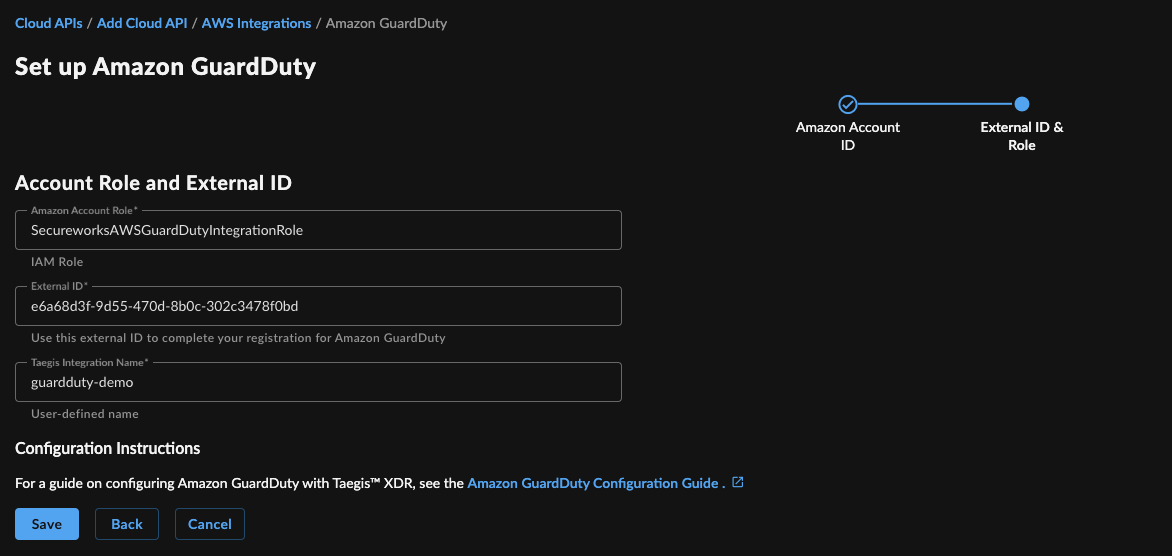
Enter IAM Role
-
Select Save to complete the integration.
-
View the integration status on Cloud APIs.

View Integration Status and Details
